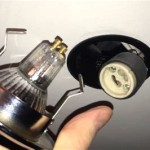
How to Effortlessly Install a Ceiling Light Fixture
Transform your home's ambiance by installing a new ceiling light fixture. Whether you're a seasoned DIY enthusiast or embarking on your first electrical endeavor, follow these comprehensive instructions and illuminate your space with ease.
Safety First: Essential Precautions
Before you begin, ensure safety by turning off the power at the breaker panel. Verify that the circuit is inactive using a voltage tester. Wear appropriate safety gear, such as insulated gloves and safety glasses, to protect yourself during installation.
Gather Necessary Materials and Tools
Assemble the following materials and tools for a smooth installation process:
- New ceiling light fixture
- Mounting screws or bolts
- Electrical tape
- Wire nuts
- Screwdriver
- Pliers
- Voltage tester
- Insulated gloves
- Safety glasses
Prepare the Ceiling Junction Box
Locate the ceiling junction box, where the wires for the light fixture will be connected. Remove the old fixture's mounting bracket and any electrical tape securing the wires. Make sure the junction box is securely fastened to the ceiling joists.
Identify and Connect Wires
Identify the black (hot), white (neutral), and green or bare copper (ground) wires. Strip about 1/2 inch of insulation from the ends of each wire using pliers. Twist the exposed wires together of the same color and secure them with wire nuts. Black to black, white to white, and green or bare copper to green or bare copper.
Attach the Mounting Bracket
Locate the mounting bracket that came with the new light fixture. Align the bracket with the junction box and secure it using the provided mounting screws or bolts. Ensure the bracket is level and firmly attached.
Hang the Light Fixture
Carefully lift the light fixture and align the base with the mounting bracket. Rotate the fixture until it locks into place. Tighten any screws or bolts as needed to secure the fixture to the bracket.
Turn On the Power and Test
Return to the breaker panel and turn the power back on. Use the light switch to operate the fixture and ensure it functions correctly. If the light doesn't turn on, check the connections and make sure all wires are securely tightened.
Troubleshooting Tips
If you encounter any issues during installation, refer to these troubleshooting tips:
- Loose wires: Ensure all wire connections are secure and twisted together properly.
- Faulty light fixture: If the light doesn't turn on after installation, check the fixture for any damage or defects.
- Tripped breaker: If the circuit breaker trips while installing the fixture, turn off the power and check for any short circuits or overloaded circuits.
Congratulations on successfully installing your new ceiling light fixture! Enjoy the enhanced illumination and refreshed ambiance it brings to your home.

Mounting Light Fixtures Fine Homebuilding

How To Install A Vintage Ceiling Light Fixture Simple Decorating Tips

How To Install A Ceiling Light Fixture Diy Family Handyman

How To Install A Ceiling Light Fixture Diy Family Handyman

How To Install Ceiling Light Homeserve Usa

How To Install A Light Fixture Diy Home Improvement

How To Install A Lighting Fixture Forbes Home

How To Replace A Ceiling Fan With Pendant Light

How To Install Ceiling Light Fixtures Ehow

How To Replace Install A Light Fixture The Art Of Manliness
Related Posts

