How To Put In Can Lights Existing Ceiling
Incorporating can lights into an existing ceiling is a practical and aesthetically pleasing way to upgrade your home's lighting. However, installing can lights requires careful planning and execution to ensure a successful outcome. This article will delve into the essential aspects of installing can lights in an existing ceiling, guiding you through the process and providing valuable tips for a seamless installation.
Before proceeding, let's clarify the part of speech of 'How To Put In Can Lights Existing Ceiling'. This phrase acts as a noun, representing the overall task or action involved in installing can lights in an existing ceiling. Understanding this allows us to structure our content around the key steps and considerations that make up this task.
Essential Aspects of Installing Can Lights in an Existing Ceiling
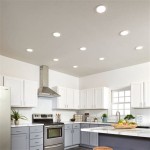
1. Planning and Preparation
Meticulous planning is crucial for a successful can light installation. Determine the number and placement of lights based on the room's size and lighting needs. Mark the locations on the ceiling and ensure they align with joists for proper support.
2. Electrical Wiring
Electrical wiring is a critical aspect that requires proper safety precautions. Identify the electrical junction box where the new wiring will connect. Run the electrical wires through the ceiling joists to each can light location, ensuring compliance with electrical codes.
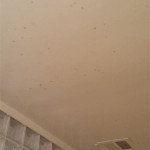
3. Cutting Holes in the Ceiling
Using a hole saw of the appropriate size, cut holes in the ceiling at the marked locations. Ensure the holes are centered and clean. If accessing the joists from above is not possible, use a drill bit to create pilot holes and then cut the holes from the attic.
4. Installing the Housing
Insert the can light housing into each hole and secure it with screws or nails. The housing should fit snugly and provide a stable base for the light fixture.
5. Connecting the Wiring
Connect the electrical wires to the can light housing, following the manufacturer's instructions. Ensure the connections are tight and secure to prevent any electrical hazards.
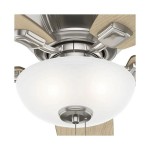
6. Installing the Trim
The trim frames the can light and provides a finished look. Slide the trim over the housing and secure it in place. Choose trim that complements the ceiling and light fixture style.
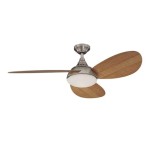
7. Inserting the Light Bulb
Finally, insert the appropriate light bulb into each can light. Select bulbs that meet the desired wattage and provide the required illumination for the space.
Conclusion
Installing can lights in an existing ceiling requires careful planning, electrical knowledge, and attention to detail. By following these essential aspects, you can achieve a professional-looking and functional lighting upgrade for your home. Remember to prioritize safety and consult with an electrician if you have any doubts or concerns.

How To Install Recessed Lighting Fixthisbuildthat

How To Install Led Recessed Lighting In Existing Ceiling Info

How To Add Can Lights Existing Ceiling Out And Guide Home Planet

Recessed Lighting In A Inium Kitchen

Energy Star Ask The Experts S

How To Put Recessed Lights In The Ceiling

Install Recessed Lighting In Your Home Office

An Easy Inexpensive Way To Replace Your Old Recessed Lights With No Rewiring Making It In The Mountains

Recessed Lighting Guide The Home Depot

Cost To Install Recessed Ceiling Lights In 2024 Forbes Home
Related Posts