Step-by-Step Guide to Installing LED Ceiling Lights
Upgrading your home's lighting with LED ceiling lights can enhance both aesthetics and energy efficiency. Here's a comprehensive guide to help you successfully install LED ceiling lights yourself:
Materials Required:
- LED ceiling light fixture
- Screwdriver
- Electrical tape
- Wire cutter/stripper
- Voltage tester
- Safety glasses
Safety Precautions:
Before starting, ensure you take necessary safety measures:
- Turn off the power at the breaker panel.
- Wear safety glasses to protect your eyes.
- Do not touch any wires or components with bare hands.
Installation Steps:
Step 1: Remove the Old Fixture (if necessary)If replacing an existing ceiling light, use a screwdriver to unscrew and remove the old fixture, gently tugging on the wires to disconnect them.
Step 2: Prepare the LED FixtureUnpack the LED fixture and familiarize yourself with its components. Typically, it includes a mounting plate, LED light panel, and a junction box.
Step 3: Install the Mounting PlateHold the mounting plate up to the ceiling junction box and align the screw holes. Secure the plate using the provided screws.
Step 4: Connect the WiresInside the junction box, identify the incoming power wires (usually black and white) and the wires from the LED fixture (also black, white, and ground). Strip about half an inch of insulation from the ends of each wire.
Connect the black (hot) wire from the fixture to the black wire from the power source, and the white (neutral) wire to the white wire. Secure the connections with electrical tape.
Step 5: Attach the Ground WireLocate the bare copper wire (ground wire) from both the fixture and the junction box. Twist them together and secure them with an electrical wire nut. This ensures proper grounding.
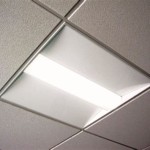
Step 6: Install the LED PanelCarefully lift the LED light panel and align it with the mounting plate. Gently press the panel into place until it locks securely.
Step 7: Test the LightTurn on the power at the breaker panel and test the light. It should turn on and illuminate evenly.
Step 8: Finishing TouchesIf the light works properly, use a screwdriver to tighten all screws and connections. Replace the light cover (if applicable) and enjoy your newly installed LED ceiling light.
Additional Tips:
- For high ceilings, consider using a stepladder or scaffold for safety.
- If you encounter any unexpected electrical issues, seek assistance from a qualified electrician.
- Dispose of old light fixtures and electrical materials responsibly.

6 Steps How To Install Led Strip Lights On Ceiling

How To Install Led Flat Panel Light Ox Lighting

How To Install Led Strip Lights On The Ceiling Lighting Info
How To Install Beautiful Led Cove Lighting At Home

How To Install Led Strip Lights 7 Easy Steps

How To Install Cove Lights Tips And Considerations

How To Use Led Strip Lights For Accentuating Ceilings

How To Install The Led Strip Light On Ceiling

How To Install Ceiling Light Homeserve Usa

Led Flat Panel Light Step By Installation Guide
Related Posts


