How to Put Light on a Ceiling Fan
Ceiling fans are a great way to cool down a room and circulate air, and adding a light fixture can make them even more useful. Whether you're installing a new ceiling fan or adding a light to an existing one, here's a step-by-step guide on how to do it safely and correctly.
Tools and Materials you'll need:
- Ceiling fan with light fixture
- Light bulbs
- Screwdriver
- Electrical tape
- Wire nuts
- Ladder
Safety First:
Before you start, make sure to turn off the power to the ceiling fan at the circuit breaker. This will prevent any electrical shocks.
Step 1: Install the Mounting Bracket
If you're installing a new ceiling fan, you'll need to start by installing the mounting bracket. This bracket will support the weight of the fan and light fixture.
To install the mounting bracket, simply follow the instructions that came with the fan. Typically, you'll need to drill holes in the ceiling and then screw the bracket into place.
Step 2: Wire the Ceiling Fan
Once the mounting bracket is installed, you can wire the ceiling fan. This involves connecting the wires from the fan to the wires from the ceiling.
To do this, simply match the colors of the wires. For example, the black wire from the fan should be connected to the black wire from the ceiling, the white wire from the fan should be connected to the white wire from the ceiling, and the green or bare copper wire from the fan should be connected to the green or bare copper wire from the ceiling.
Once the wires are connected, make sure to secure them with wire nuts.
Step 3: Install the Light Fixture
Once the ceiling fan is wired, you can install the light fixture. This involves attaching the light fixture to the fan and then connecting the wires.
To attach the light fixture, simply follow the instructions that came with the fan. Typically, you'll need to screw the light fixture into place.
Once the light fixture is attached, you can connect the wires. To do this, simply match the colors of the wires and twist them together. Then, secure the wires with electrical tape.
Step 4: Install the Light Bulbs
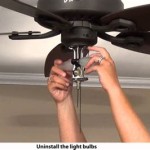
Once the light fixture is installed, you can install the light bulbs. Simply screw the light bulbs into the sockets.
Step 5: Turn on the Power
Once the light bulbs are installed, you can turn on the power to the ceiling fan at the circuit breaker. The fan and light should now be working properly.
Troubleshooting:
If the ceiling fan or light fixture is not working properly, there are a few things you can check:
- Make sure that the power is turned on at the circuit breaker.
- Check the connections of the wires. Make sure that the wires are securely connected and that there are no loose wires.
- If you're using a new light fixture, make sure that the light bulbs are compatible with the fixture.
If you're still having trouble, you may need to call an electrician for assistance.

How To Add A Light Kit Your Ceiling Fan Mr Electric

How To Install A Light On Ceiling Fan 11 Steps
Replacing A Ceiling Fan Light With Regular Fixture Jlc

Can You Add A Light Fixture To Ceiling Fan Rings World The Local Business Directory For Small And Large Businesses

How To Install A Light On Ceiling Fan 11 Steps

Replacing A Ceiling Fan Light With Regular Fixture Jlc

4 Ways To Replace A Light Bulb In Ceiling Fan Wikihow

Update An Old Fan On The With A Chic Shade To Makeover Your Ceiling

How To Install A Ceiling Fan With Light Girl S Guide Home Diy

4 Ways To Replace A Light Bulb In Ceiling Fan Wikihow
Related Posts

