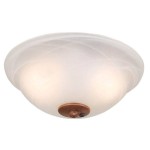
How to Install a Ceiling Light Fixture
Installing a ceiling light fixture can be a daunting task, but with the right tools and a little bit of know-how, it's a job that most homeowners can tackle on their own. Here's a step-by-step guide to help you get the job done safely and correctly.
Tools and Materials You'll Need:
* New ceiling light fixture * Screwdriver * Wire strippers * Electrical tape * Ladder * Safety glassesStep 1: Turn Off the Power
Before you start any electrical work, it's important to turn off the power to the circuit that you'll be working on. You can do this by flipping the circuit breaker or removing the fuse that corresponds to the circuit. Once the power is off, double-check that it's off by using a voltage tester to ensure there's no electricity running to the fixture.
Step 2: Remove the Old Fixture
Once the power is off, you can remove the old fixture. Start by unscrewing the screws that hold the cover plate in place. Once the cover plate is removed, you'll see the fixture itself. Unscrew the screws that hold the fixture to the ceiling and carefully pull the fixture down. Be careful not to damage the wires.
Step 3: Prepare the Wires
Once the old fixture is removed, you'll need to prepare the wires for the new fixture. Start by stripping about 1/2 inch of insulation from the ends of the wires. Once the wires are stripped, twist the ends of the wires together. Do not connect the wires yet.
Step 4: Install the New Fixture
Now it's time to install the new fixture. Start by feeding the wires from the fixture through the hole in the ceiling. Once the wires are through, connect the wires to the wires in the ceiling. Make sure to connect the black wire to the black wire, the white wire to the white wire, and the green or bare wire to the ground wire. Twist the wires together and secure them with electrical tape.
Once the wires are connected, push the fixture up into the hole in the ceiling. Make sure the fixture is flush with the ceiling and that the wires are not pinched.
Step 5: Secure the Fixture
Once the fixture is in place, secure it with the screws that came with the fixture. Tighten the screws until the fixture is snug against the ceiling.
Step 6: Install the Cover Plate
Finally, install the cover plate over the fixture. Secure the cover plate with the screws that came with the fixture. Once the cover plate is in place, turn the power back on and test the fixture to make sure it's working properly.
Congratulations! You've successfully installed a ceiling light fixture. If you follow these steps carefully, you'll be able to get the job done safely and correctly.

How To Install Ceiling Light Homeserve Usa

How To Install A Vintage Ceiling Light Fixture Simple Decorating Tips

How To Replace Install A Light Fixture The Art Of Manliness

How To Install A Ceiling Light Fixture Diy Family Handyman

How To Install A Ceiling Light Fixture Diy Family Handyman

How To Replace Install A Light Fixture The Art Of Manliness

How To Install A Lighting Fixture Forbes Home

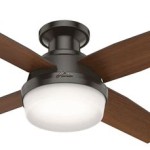
How To Replace A Ceiling Fan With Pendant Light

How To Install Ceiling Light Fixtures Ehow

How To Install A Ceiling Light Fixture Diy Family Handyman
Related Posts