How to Remove a Light Shade from a Ceiling Fan
Ceiling light shades can accumulate dust and grime over time, and it's important to clean them regularly to maintain their appearance and ensure optimal light output. Removing the light shade from a ceiling fan is a relatively simple task that can be completed in a few easy steps, allowing you to perform proper cleaning and maintenance.
Materials You'll Need
- Ladder or step stool
- Screwdriver (if necessary)
Safety First
Before beginning, ensure your ceiling fan is turned off and the power is disconnected at the circuit breaker or fuse box. Use a ladder or step stool to reach the ceiling fan safely.
Identify the Type of Light Shade
There are two common types of light shades used on ceiling fans: clip-on shades and screw-on shades.
- Clip-on shades simply clip onto the light bulb socket without the need for additional tools.
- Screw-on shades, on the other hand, are attached using small screws that secure them to the light bulb socket.
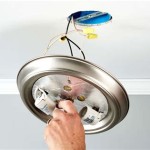
Removing a Clip-On Light Shade
- Gently grasp the light shade with both hands.
- Pull the shade straight down, away from the light bulb socket.
- If the shade is stuck, wiggle it slightly while pulling down.
Removing a Screw-On Light Shade
- Locate the screws that attach the light shade to the light bulb socket.
- Using a screwdriver, carefully unscrew the screws.
- Once all the screws are removed, gently lift the shade straight up to detach it from the socket.
Cleaning the Light Shade
Once the light shade is removed, you can clean it using warm water and a mild detergent. If the shade is particularly dirty, you can soak it in a solution of warm water and vinegar for a few minutes before washing it.
Reattaching the Light Shade
After cleaning the light shade, it's time to reattach it to the ceiling fan.
- Clip-on shades: Align the shade with the light bulb socket and firmly clip it into place.
- Screw-on shades: Position the shade over the light bulb socket and align the screw holes. Insert the screws and tighten them securely using a screwdriver.
Final Check
Once the light shade is reattached, turn the power back on and check that the light shade is secured properly and the fan is operating normally.
Tips
- If the light shade is fragile, use a soft cloth to avoid scratching it.
- When reattaching a screw-on shade, don't overtighten the screws.
- If you encounter any difficulties during the removal or reattachment process, consult the ceiling fan manufacturer's instructions or contact a qualified electrician for assistance.

4 Ways To Replace A Light Bulb In Ceiling Fan Wikihow

4 Ways To Replace A Light Bulb In Ceiling Fan Wikihow

4 Ways To Replace A Light Bulb In Ceiling Fan Wikihow

How To Remove A Ceiling Fan The Home Depot

Ceiling Fan Light Repair Home Tutor

Ceiling Fan Makeover 100 Room Challenge The Palette Muse

How To Replace A Ceiling Fan Light Kit

How To Update Modernize Your Ceiling Fan

4 Ways To Replace A Light Bulb In Ceiling Fan Wikihow

How To Install A Ceiling Fan Lowe S
Related Posts


