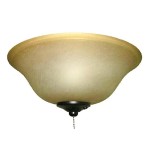
How to Remove a Stuck Light Bulb from a Ceiling Fan
Ceiling fans can be a great way to keep your home cool and comfortable, but they can also be a pain to deal with when the light bulbs burn out. If you're having trouble removing a stuck light bulb from your ceiling fan, don't worry - we're here to help. In this article, we'll walk you through the steps on how to remove a stuck light bulb from a ceiling fan safely and easily.
Step 1: Gather Your Tools
Before you start, you'll need to gather a few tools. You'll need a pair of pliers, a screwdriver, and a ladder. If the light bulb is high up, you may also need a step stool or a chair.
Step 2: Turn Off the Power
Once you have your tools, the first thing you need to do is turn off the power to the ceiling fan. This is important for safety reasons. You can turn off the power at the circuit breaker or fuse box.
Step 3: Remove the Light Bulb Cover
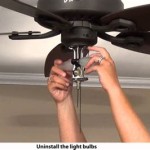
Once the power is off, you can remove the light bulb cover. The light bulb cover is usually held in place by a few screws. Use your screwdriver to remove the screws and then carefully lift off the light bulb cover.
Step 4: Grip the Light Bulb
Once the light bulb cover is removed, you'll be able to see the light bulb. Grip the light bulb firmly with your pliers. Be careful not to touch the glass part of the light bulb, as this could cause it to shatter.
Step 5: Unscrew the Light Bulb
Once you have a good grip on the light bulb, start unscrewing it. Turn the light bulb counterclockwise until it comes loose. If the light bulb is stuck, you can try using a penetrating oil to loosen it up. Apply a few drops of penetrating oil to the threads of the light bulb and then wait a few minutes for it to soak in. Once the penetrating oil has had a chance to work, try unscrewing the light bulb again.
Step 6: Replace the Light Bulb
Once you've removed the stuck light bulb, you can replace it with a new one. Screw the new light bulb into the socket clockwise until it's tight. Be careful not to overtighten the light bulb, as this could damage it.
Step 7: Replace the Light Bulb Cover
Once the new light bulb is in place, you can replace the light bulb cover. Secure the light bulb cover with the screws that you removed earlier.
Step 8: Turn On the Power
Once the light bulb cover is back in place, you can turn the power back on to the ceiling fan. The new light bulb should now be working properly.
Tips for Removing a Stuck Light Bulb
- If the light bulb is high up, you may need to use a step stool or a chair to reach it.
- Be careful not to touch the glass part of the light bulb, as this could cause it to shatter.
- If the light bulb is stuck, you can try using a penetrating oil to loosen it up.
- Don't overtighten the new light bulb, as this could damage it.
Conclusion
Removing a stuck light bulb from a ceiling fan can be a pain, but it's not impossible. By following the steps in this article, you can safely and easily remove a stuck light bulb and replace it with a new one.

Lightbulb Thread Broke Off In Ceiling Fan How Can I Replace The Bulb R Askelectricians

4 Ways To Replace A Light Bulb In Ceiling Fan Wikihow

4 Ways To Replace A Light Bulb In Ceiling Fan Wikihow

How To Remove A Stuck Light Bulb Safely From Socket Solved

How To Remove A Stuck Lightbulb Certified Electrician

4 Ways To Replace A Light Bulb In Ceiling Fan Wikihow

4 Ways To Replace A Light Bulb In Ceiling Fan Wikihow

Lightbulb Thread Broke Off In Ceiling Fan How Can I Replace The Bulb R Askelectricians

How To Remove A Broken Light Bulb Home Ec 101

Ceiling Fan Light Repair Home Tutor
Related Posts


