How To Remove The Light From A Ceiling Fan
Removing the light from a ceiling fan can be a necessary task for maintenance, repair, or replacement. Understanding the essential aspects of this process is crucial to ensure safety and efficiency. This article will explore the key steps involved in removing the light from a ceiling fan, focusing on the essential aspects that guide the process.
Before proceeding, it's crucial to ensure safety by turning off the circuit breaker or fuse that powers the ceiling fan. This will prevent electrical shock and potential injuries. Additionally, gather necessary tools such as a screwdriver, pliers, and a ladder for safe access to the ceiling fan.
1. Disconnect the Power Source
The first essential step is to disconnect the power source. Locate the circuit breaker panel or fuse box and identify the circuit or fuse that controls the ceiling fan. Turn off the breaker or remove the fuse to cut off the electricity supply to the fan.
2. Remove the Light Cover
Next, remove the light cover that encloses the light fixture. This cover is typically held in place by screws or clips. Use a screwdriver or pliers to carefully remove these fasteners and gently lift off the light cover.
3. Disconnect the Fixture Wires
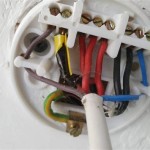
Once the light cover is removed, you will see the electrical wires connected to the light fixture. These wires are typically held together by wire nuts or electrical tape. Use a pair of pliers to twist and remove the wire nuts or carefully cut the electrical tape to separate the wires.
4. Remove the Mounting Screws
Locate the screws that hold the light fixture in place. These screws are typically located on the mounting bracket or base of the fixture. Use a screwdriver to carefully remove these screws, being mindful not to drop them.
5. Lower the Fixture
Once the mounting screws are removed, gently lower the light fixture from the mounting bracket. Hold the fixture securely to prevent it from falling and causing damage. Carefully guide the fixture down through the opening in the ceiling fan.
6. Remove the Electrical Wires
With the light fixture lowered, you will have better access to the electrical wires that connect it to the ceiling fan. Use pliers to twist and remove the wire nuts or cut the electrical tape to disconnect the wires. Label the wires for easy identification when reassembling the fan.
7. Remove the Fixture
Once the electrical wires are disconnected, the light fixture can be completely removed. Carefully lift the fixture out of the ceiling fan and set it aside for repair or replacement.
Conclusion
Removing the light from a ceiling fan requires careful attention to essential aspects such as safety, proper tool selection, and a systematic approach. By following the steps outlined in this article, you can safely and effectively remove the light from your ceiling fan, ensuring proper maintenance, repair, or replacement.

4 Ways To Replace A Light Bulb In Ceiling Fan Wikihow

4 Ways To Replace A Light Bulb In Ceiling Fan Wikihow

How To Remove A Ceiling Fan Krueger Electric

4 Ways To Replace A Light Bulb In Ceiling Fan Wikihow
Ceiling Fan Light Fixture Replacement Ifixit Repair Guide

4 Ways To Replace A Light Bulb In Ceiling Fan Wikihow

Simple Tips To Help Remove A Stuck Glass Ceiling Fan Light Cover

How To Remove A Ceiling Fan Temecula Handyman

Replacing A Ceiling Fan Light With Regular Fixture Jlc

4 Ways To Replace A Light Bulb In Ceiling Fan Wikihow
Related Posts


