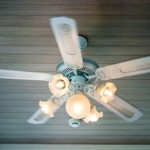
How to Replace a Can Light with a Ceiling Fan
Replacing a can light with a ceiling fan is a relatively simple project that can be completed in a few hours. By following these steps, you can add light and airflow to your room while also improving its overall appearance.
Materials and Tools
- Ceiling fan
- Can light trim ring
- Can light socket adapter
- Electrical tape
- Screwdriver
- Wire cutters
- Ladder
Safety First
Before you begin, turn off the power to the can light at the breaker panel. This will prevent you from getting shocked while working. Also, make sure that the ladder you are using is stable and secure before climbing it.
Remove the Can Light Trim Ring
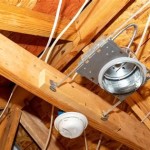
Use a screwdriver to remove the screws that hold the can light trim ring in place. Once the screws are removed, carefully pull the trim ring down and off of the can light housing.
Disconnect the Can Light Socket
Inside the can light housing, you will see the can light socket. Disconnect the wires from the socket by unscrewing the wire nuts. Once the wires are disconnected, carefully pull the socket out of the housing.
Install the Can Light Socket Adapter
Screw the can light socket adapter into the can light housing. Make sure that the adapter is tight so that it does not come loose when the ceiling fan is installed.
Connect the Ceiling Fan Wires
Connect the wires from the ceiling fan to the can light socket adapter. The black wire from the ceiling fan should be connected to the black wire from the adapter. The white wire from the ceiling fan should be connected to the white wire from the adapter. The green wire from the ceiling fan should be connected to the green wire from the adapter.
Wrap the Connections with Electrical Tape
Wrap the connections with electrical tape to insulate them and prevent them from coming loose. Make sure that the tape is wrapped tightly and securely.
Install the Ceiling Fan
Lift the ceiling fan up into place and align the mounting bracket with the can light socket adapter. Screw the mounting bracket into the adapter until it is tight. Once the ceiling fan is installed, turn the power back on at the breaker panel.
Enjoy Your New Ceiling Fan
Your new ceiling fan is now installed and ready to use. Enjoy the light and airflow that it provides.
Tips
- If you are not comfortable working with electricity, it is best to hire a qualified electrician to install the ceiling fan for you.
- Make sure that the ceiling fan you choose is the correct size for your room. A fan that is too small will not provide adequate airflow, while a fan that is too large may be too noisy or wobbly.
- When installing the ceiling fan, be sure to use a mounting bracket that is designed for the type of ceiling you have. Otherwise, the fan may not be secure and could fall.

4 Ways To Replace A Light Bulb In Ceiling Fan Wikihow

4 Ways To Replace A Light Bulb In Ceiling Fan Wikihow
Replacing A Ceiling Fan Light With Regular Fixture Jlc

How To Replace A Light Fixture With Ceiling Fan Projects By Peter

How To Replace A Ceiling Fan With Pendant Light

How To Replace A Ceiling Fan Light Kit Smafan Com

4 Ways To Replace A Light Bulb In Ceiling Fan Wikihow

5 Tips For Replacing A Light Fixture With Ceiling Fan Dig This Design

Wiring A Ceiling Fan And Light With Diagrams Ptr

Average Ceiling Fan Installation Cost 2024 Forbes Home
Related Posts

