How to Replace a Ceiling Fan with a Light
A ceiling fan with a light is an excellent addition to any room. It provides light and air circulation, which can make a room feel more comfortable and inviting. However, over time, ceiling fans can become outdated or malfunction, necessitating replacement.
Replacing a ceiling fan with a light is a relatively simple task that can be completed in a few hours. However, it is important to take safety precautions and follow the manufacturer's instructions carefully.
Safety Precautions
Before beginning any work, it is important to turn off the power to the ceiling fan at the circuit breaker or fuse box. This will prevent you from being electrocuted.
You should also wear safety glasses and gloves to protect yourself from any debris or sharp edges.
Tools and Materials
To replace a ceiling fan with a light, you will need the following tools and materials:
- Phillips head screwdriver
- Flat head screwdriver
- Wire cutters
- Electrical tape
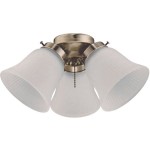
- Ceiling fan with light
Step-by-Step Instructions
- Remove the old ceiling fan. To do this, first remove the light bulbs from the fan. Then, use a Phillips head screwdriver to remove the screws that hold the fan blades to the fan motor. Next, use a flat head screwdriver to remove the screws that hold the fan motor to the ceiling. Finally, carefully lower the fan motor down from the ceiling.
- Prepare the new ceiling fan. To do this, first assemble the fan blades according to the manufacturer's instructions. Then, wire the fan motor to the electrical wires in the ceiling. Be sure to connect the wires of the same color together. Finally, secure the fan motor to the ceiling.
- Install the light fixture. To do this, first attach the light fixture to the fan motor. Then, wire the light fixture to the electrical wires in the ceiling. Be sure to connect the wires of the same color together. Finally, secure the light fixture to the fan motor.
- Install the fan blades. To do this, first insert the fan blades into the slots on the fan motor. Then, secure the fan blades with the screws that you removed earlier.
- Turn on the power. Once the ceiling fan with light is installed, turn on the power at the circuit breaker or fuse box. Test the fan to make sure that it is working properly.
Tips
- If you are not comfortable working with electricity, it is best to hire a qualified electrician to replace your ceiling fan.
- Be sure to read the manufacturer's instructions carefully before beginning any work.
- Take your time and do not rush the process.
Conclusion
Replacing a ceiling fan with a light is a relatively simple task that can be completed in a few hours. By following the safety precautions and step-by-step instructions above, you can safely and easily replace your old ceiling fan with a new one.

4 Ways To Replace A Light Bulb In Ceiling Fan Wikihow

Replacing A Ceiling Fan Light With Regular Fixture Jlc

4 Ways To Replace A Light Bulb In Ceiling Fan Wikihow

How To Replace A Ceiling Fan With Pendant Light

Replacing A Ceiling Fan Light With Regular Fixture Jlc

Wiring A Ceiling Fan And Light With Diagrams Ptr

How To Replace A Ceiling Fan Light Kit Smafan Com

4 Ways To Replace A Light Bulb In Ceiling Fan Wikihow

4 Ways To Replace A Light Bulb In Ceiling Fan Wikihow

Wiring A Ceiling Fan And Light With Diagrams Ptr
Related Posts