How to Seamlessly Replace a Hampton Bay Ceiling Fan Light Switch
Hampton Bay ceiling fans are admired for their stylish designs and efficient performance, and they can elevate the aesthetics of any room. However, if the light switch on your Hampton Bay ceiling fan malfunctions or becomes problematic, it's essential to replace it promptly to ensure continued functionality and safety. This comprehensive guide will walk you through each step of the replacement process, ensuring a smooth and successful outcome.
Step 1: Safety First
Before commencing the replacement task, adhere to these critical safety precautions to prevent any potential hazards or electrical shocks:
- Turn off the power supply at the circuit breaker or fuse box. Verify that the power is off using a non-contact voltage tester.
- Use a sturdy ladder or step stool to safely reach the ceiling fan and its components.
- Wear gloves to protect your hands from any sharp edges or electrical wires.
Step 2: Remove the Light Switch Module
Locate the light switch module, which is usually attached to the ceiling fan's canopy. Gently pull the bottom part of the module downwards to detach it from the canopy. It might be necessary to slightly wiggle the module to loosen it. Avoid using excessive force as it may damage the components.
Step 3: Disconnect the Wiring
Inside the light switch module, you will find a cluster of wires that connect the switch to the fan's wiring system. Carefully note the position and color of each wire before disconnecting them. Use a pair of needle-nose pliers to gently squeeze the wire connectors and pull the wires apart. Label each wire with a piece of tape or a marker to ensure correct reconnection later.
Step 4: Remove the Old Switch
Once the wires are disconnected, remove the mounting screws that hold the old light switch in place. Carefully lift the switch out of the module, taking care not to drop or damage any components.
Step 5: Install the New Switch
Take the new light switch and align it with the mounting holes in the module. Secure the switch in place using the screws you removed earlier. Ensure the switch is firmly fastened, but avoid overtightening the screws.
Step 6: Reconnect the Wiring
Referring to your notes or the color coding of the wires, reconnect them to the new light switch. Insert each wire into the corresponding connector and squeeze the connector firmly with the needle-nose pliers to create a secure connection. Double-check all connections to ensure they are tight and properly aligned.
Step 7: Reinstall the Light Switch Module
Carefully align the light switch module with the canopy of the ceiling fan. Gently push the module upwards until it snaps securely into place. Ensure the module is flush with the canopy to prevent any gaps or rattles.
Step 8: Restore Power and Test
Return to the circuit breaker or fuse box and turn the power back on. Operate the new light switch to verify its functionality. The light attached to the ceiling fan should turn on and off as intended. If there are any issues, double-check the wiring connections and ensure they are secure and correct.
Conclusion
Replacing a Hampton Bay ceiling fan light switch is a relatively straightforward task with the right tools and safety precautions. By following the steps outlined in this guide, you can ensure a successful replacement and restore the functionality of your ceiling fan. If you have any doubts or concerns, do not hesitate to consult with a licensed electrician for professional assistance.

Hampton Bay Light Kit Not Working R Askelectricians

Ceiling Fan Light Repair Home Tutor

How To Install A Hampton Bay Ceiling Fan Light Kit Fans Lighting

Have A Question About Hampton Bay Ceiling Fan Wall Switch Pg 5 The Home Depot

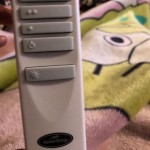
Troubleshooting Your Remote Controls Step By Hampton Bay Ceiling Fans Lighting

4 Ways To Replace A Light Bulb In Ceiling Fan Wikihow

Hampton Bay Ceiling Fan Wall Switch 9050h The Home Depot

Troubleshooting Your Remote Controls Step By Hampton Bay Ceiling Fans Lighting

Troubleshooting Your Remote Controls Step By Hampton Bay Ceiling Fans Lighting

Hampton Bay Averly 52 In Integrated Led Brushed Nickel Ceiling Fan With Light And Remote Control Color Changing Technology Ak18b Bn The Home Depot
Related Posts


