How To Replace a Ceiling Light with an LED Fixture
Replacing an existing ceiling light with a new LED fixture is a common home improvement project that offers several benefits. LED lights are significantly more energy-efficient, last considerably longer, and offer a range of color temperatures and brightness options. This guide will walk through the process of replacing a standard ceiling light with an LED fixture.
Safety First: Before commencing any electrical work, ensure the power is turned off at the circuit breaker. Verify the power is off by flipping the existing light switch. Using a non-contact voltage tester is recommended to double-check that no power is flowing to the wires.
Gather Necessary Tools and Materials: Having the correct tools on hand simplifies the process. Typically, the following items are required: a ladder, screwdrivers (Phillips and flathead), wire strippers/cutters, electrical tape, wire nuts, and the new LED ceiling light fixture. Some fixtures may require additional tools, so consult the manufacturer's instructions.
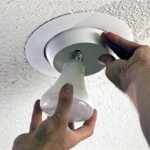
Removing the Old Fixture: Begin by removing the screws or bolts holding the existing light fixture to the ceiling electrical box. Gently lower the fixture, being mindful of the wires still connecting it. Once lowered enough to access the wiring compartment, disconnect the wires. Most fixtures utilize wire nuts to connect the wires. Carefully unscrew the wire nuts and separate the wires.
Identifying the Wiring: There will typically be three wires: black (hot), white (neutral), and bare copper or green (ground). If the wiring is different, it's advisable to consult a qualified electrician. Take note of how the wires on the old fixture were connected as this will guide the connection of the new LED fixture.
Connecting the New LED Fixture: The new LED fixture will have corresponding wires. Connect the black wire from the fixture to the black wire from the ceiling box using a wire nut. Repeat this process for the white (neutral) and ground wires, ensuring the wire nut securely fastens the wires together. Tuck the wires neatly into the electrical box.
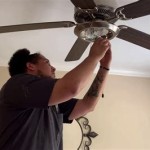
Mounting the New Fixture: Align the mounting bracket of the new LED fixture with the electrical box. Secure the fixture to the box using the screws provided. Ensure the fixture is flush with the ceiling and securely attached.
Testing the New Fixture: Once the fixture is securely mounted and the wiring is complete, restore power at the circuit breaker. Turn on the light switch to test the new LED fixture. If the light doesn't illuminate, double-check the wiring connections and ensure the power is on.
Special Considerations for Different Fixture Types: The process outlined above applies to most standard ceiling light replacements. However, some fixtures may have unique installation requirements.
Recessed Lighting: Replacing recessed lighting, also known as can lights, involves considerations specific to these fixtures. Ensure compatibility with the existing housing and follow the manufacturer’s instructions carefully.
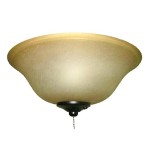
Flush Mount Fixtures: Flush mount fixtures sit directly against the ceiling and often involve a mounting plate that attaches to the electrical box before the fixture is secured. Carefully follow the manufacturer's instructions for proper installation.
Chandeliers and Pendant Lights: These fixtures often require additional support and may involve different wiring configurations. Consult the manufacturer's instructions for specific guidance.
Troubleshooting Common Issues: If the new LED light doesn't work, there are several common issues to check. Ensure the circuit breaker is on and the light switch is in the correct position. Verify all wire connections are secure and properly capped with wire nuts. If the problem persists, consult a qualified electrician.
Working with Dimmers: If the existing light was on a dimmer switch, ensure the new LED fixture is dimmer compatible. Using a non-compatible dimmer may damage the LED driver and void the warranty.
Importance of Proper Grounding: Proper grounding is crucial for safety. Ensure the ground wire is securely connected to prevent electrical shocks.
When to Consult a Professional: While replacing a ceiling light is often a manageable DIY project, certain situations warrant consulting a qualified electrician. If the wiring is complex, if the existing electrical box is damaged, or if any uncertainty exists regarding the process, it's advisable to seek professional assistance.
Disposing of Old Fixtures: Dispose of the old light fixture responsibly. Check local regulations for proper disposal methods for electronic waste.

How To Replace Led Ceiling Light Leng8021

Easy Ways To Replace An Led Recessed Light Bulb 13 Steps

Lighting How Do I Replace The Led Bulb In This Ceiling Light Home Improvement Stack Exchange

How To Replace Recessed Lighting With Led The Home Depot

Installing Led Light To Replace Fluorescent Lights Electrician Singapore Recommended Services

Easy Ways To Replace An Led Recessed Light Bulb 13 Steps

How To Replace A Ceiling Light Fixture Stanley Tools

Led Ceiling Light Seems Very Difficult To Replace And Started Failing About A Week Ago It Randomly Turns Back On Sometimes Is There Way Its Batteries Or Fix

How To Replace Recessed Lighting With Led The Home Depot

Commercial Electric 13 In White Oil Rubbed Broe Trims 1350 Lumens Led Flush Mount Ceiling Light Fixture With Night Adjustable Cct 56584112 The Home Depot
Related Posts