How To Replace a Chandelier With a Ceiling Fan
Replacing a chandelier with a ceiling fan offers both aesthetic and functional benefits. A ceiling fan adds comfort during warmer months while providing a focal point for the room. This guide provides step-by-step instructions for safely and effectively completing this project.
Safety First: Before beginning any electrical work, always turn off the power to the circuit at the breaker box. Double-check the fixture is off by flipping the light switch. Using a non-contact voltage tester is also recommended to ensure the power is completely off.
1. Removing the Chandelier: Begin by carefully examining the chandelier's mounting system. Most chandeliers are attached to the electrical box in the ceiling with a canopy covering the mounting hardware. This canopy is typically secured with screws or decorative nuts. Once these are removed, the canopy can be lowered or removed, revealing the wiring connections.
2. Disconnecting the Wiring: After the canopy is removed, the wiring connections will be visible. Typically, there will be wires connecting the chandelier to the house wiring. These connections are often secured with wire nuts. Carefully unscrew the wire nuts and separate the wires. Take note of the wire colors and their corresponding connections (typically black to black, white to white, and ground to ground). It's helpful to take a picture of the wiring before disconnecting it as a reference.
3. Removing the Mounting Bracket: Once the wiring is disconnected, the chandelier can be carefully lowered and removed. Depending on the chandelier's weight, assistance may be required. After removing the chandelier, remove the mounting bracket or strap that secured it to the electrical box. This will prepare the ceiling for the ceiling fan installation.
4. Assessing the Electrical Box: Ceiling fans are heavier than chandeliers and require a properly supported electrical box specifically rated for fan installation. Check the existing electrical box to ensure it is a fan-rated box. These boxes are typically marked with "For Fan Support" or similar wording. If the existing box is not fan-rated, it must be replaced with a suitable one. This often involves accessing the attic or ceiling space above.
5. Installing the Ceiling Fan Mounting Bracket: The ceiling fan will come with its own mounting bracket. Follow the manufacturer's instructions to install this bracket securely to the electrical box. Ensure the bracket is properly aligned and capable of supporting the fan's weight.
6. Wiring the Ceiling Fan: With the mounting bracket secured, connect the ceiling fan's wiring to the house wiring, matching the wire colors as they were connected to the chandelier (black to black, white to white, and ground to ground). Use appropriately sized wire nuts to secure the connections and ensure they are snug. Tuck the wires neatly into the electrical box.
7. Attaching the Ceiling Fan: Once the wiring is complete, carefully lift the ceiling fan and attach it to the mounting bracket following the manufacturer's instructions. This process varies depending on the fan model and may involve securing screws or engaging a locking mechanism. Ensure the fan is securely attached before proceeding.
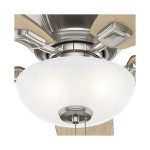
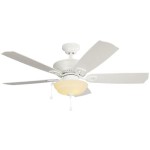
8. Installing the Blades and Light Kit (if applicable): Most ceiling fans require the blades to be attached after the fan motor is mounted. Follow the manufacturer’s instructions for attaching the blades and any included light kit. Ensure all screws and connections are tightened securely.
9. Installing the Canopy and Pull Chains: After the blades and light kit are installed, attach the canopy to the ceiling fan mounting bracket, concealing the wiring and mounting hardware. Install the pull chains for the fan speed and light control if your model uses them. Some models use remote control systems installed according to the manufacturer’s instructions.
10. Restoring Power and Testing: Once the installation is complete, restore the power to the circuit at the breaker box. Test the fan's operation by using the pull chains or remote control. Check for any wobbling or unusual noises, which may indicate an issue with the installation. If any problems are detected, immediately turn off the power and review the installation steps.
Professional Assistance: While this guide provides a general overview, ceiling fan installations can be complex and challenging, particularly when dealing with electrical wiring and heavy fixtures. If any aspect of the process is unclear or if there are concerns about the electrical system, consulting a qualified electrician is strongly recommended. Professional assistance ensures a safe and successful installation.
Building Codes and Regulations: Local building codes and regulations may apply to electrical work. It is important to verify compliance with all relevant codes and obtain any necessary permits before starting the project. Inspections may be required after the installation is complete.

How To Replace A Ceiling Fan With Pendant Light

Replacing A Ceiling Fan Light With Regular Fixture Jlc

Replacing A Ceiling Fan Light With Regular Fixture Jlc

How To Replace A Light Fixture With Ceiling Fan Projects By Peter

How To Replace A Light Fixture With Ceiling Fan Projects By Peter

How To Add A Light Kit Your Ceiling Fan Mr Electric

4 Ways To Replace A Light Bulb In Ceiling Fan Wikihow

How To Replace A Light Fixture With Ceiling Fan Projects By Peter

How To Pick The Perfect Chandelier Ceiling Fan For Your Living Room

Matching Ceiling Fan And Lighting Fixtures For 2024 Spring Hunter