How to Replace Halogen Bulb in Ceiling Fan
Ceiling fans are an excellent way to keep your home cool and comfortable, especially during summer. They can also add a touch of style and elegance to your decor. However, if the halogen bulb in your ceiling fan burns out, it can quickly put a damper on things. Replacing a halogen bulb in a ceiling fan is a relatively simple task that you can do yourself with a few basic tools.
Step 1: Gather Your Supplies
Before you begin, you will need to gather the following supplies:
- A new halogen bulb that is compatible with your ceiling fan. You can find the correct bulb by checking the manufacturer's instructions or by taking the old bulb to the store with you.
- A ladder
- A Phillips head screwdriver
- A pair of pliers or needle-nose pliers
- A cloth or paper towel
- Safety glasses
Step 2: Turn Off the Power
Before you do anything else, you need to turn off the power to the ceiling fan. You can do this by flipping the circuit breaker that controls the fan or by removing the fuse that powers it. Once the power is off, you can proceed to the next step.
Step 3: Remove the Light Cover
The light cover is usually held in place by a few screws. Use your Phillips head screwdriver to remove the screws and then carefully remove the light cover. Be careful not to drop the light cover, as it can break.
Step 4: Remove the Old Halogen Bulb
Once the light cover is removed, you will be able to see the halogen bulb. Use your pliers to gently grasp the bulb and remove it from the socket. Be careful not to burn yourself on the bulb, as it may still be hot.
Step 5: Clean the Socket
Before you install the new bulb, take a moment to clean the socket. You can use a cloth or paper towel to wipe away any dirt or debris. This will help to ensure that the new bulb makes good contact with the socket.
Step 6: Install the New Halogen Bulb
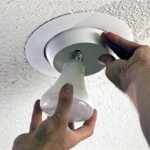
Now you are ready to install the new halogen bulb. Simply insert the bulb into the socket and twist it until it is snug. Be careful not to overtighten the bulb, as this can damage the socket.
Step 7: Reattach the Light Cover
Once the new bulb is in place, you can reattach the light cover. Replace the screws that you removed earlier and tighten them until they are snug. Be careful not to overtighten the screws, as this can crack the light cover.
Step 8: Turn on the Power
Once the light cover is back in place, you can turn on the power to the ceiling fan. The new halogen bulb should now be lit.
Safety Tips
Here are a few safety tips to keep in mind when replacing a halogen bulb in a ceiling fan:
- Always turn off the power to the ceiling fan before you begin working on it.
- Be careful not to touch the halogen bulb with your bare hands, as this can cause the bulb to burn out prematurely.
- Wear safety glasses to protect your eyes from flying debris.
- If you are not comfortable working on electrical fixtures, you can always call an electrician to do the job for you.

4 Ways To Replace A Light Bulb In Ceiling Fan Wikihow

4 Ways To Replace A Light Bulb In Ceiling Fan Wikihow

4 Ways To Replace A Light Bulb In Ceiling Fan Wikihow

4 Ways To Replace A Light Bulb In Ceiling Fan Wikihow

4 Ways To Replace A Light Bulb In Ceiling Fan Wikihow

4 Ways To Replace A Light Bulb In Ceiling Fan Wikihow

Simple Ways To Change Halogen Light Bulbs 14 Steps

How To Choose A Light Bulb For Your Ceiling Fan

How To Replace A Light Fixture With Ceiling Fan Projects By Peter

How To Replace A Halogen Light Bulb Doityourself Com
Related Posts


