How To Set Up a Ceiling Fan Remote Control
Installing a ceiling fan remote control offers convenient management of fan speed and lighting. This guide provides comprehensive instructions for setting up a variety of ceiling fan remote controls, covering both new installations and replacing existing units.
Before beginning any electrical work, ensure the power is turned off at the breaker box. This crucial safety step prevents electrical shock and ensures a safe working environment.
Preparing for Installation
Gather necessary tools, including a screwdriver, wire strippers, wire connectors, and electrical tape. Having these readily available streamlines the installation process.
Examine the ceiling fan's existing wiring and the receiver unit included with the remote. Familiarizing oneself with the wiring scheme simplifies the connection process. Most receiver units will have wires labeled for connection to the fan's motor, light, and power source.
Consult the manufacturer's instructions for the specific remote control model. These instructions provide tailored guidance and address any unique features or wiring configurations.
Installing the Receiver Unit
The receiver unit typically mounts inside the ceiling fan's canopy. Remove the existing canopy to access the wiring connections. Secure the receiver unit within the canopy, ensuring it does not interfere with the fan's rotation.
Connect the wires from the receiver unit to the corresponding wires from the fan. Commonly, these include black (hot), white (neutral), blue (light), and green (ground). Use wire connectors to secure each connection and ensure proper electrical contact. Wrap the connections with electrical tape for added security.
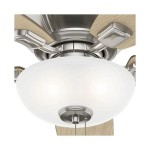
If the fan includes a light kit, connect the light kit wires to the designated wires on the receiver unit, following the manufacturer's instructions.
Carefully tuck the wiring into the canopy and replace the canopy, ensuring a snug fit.
Pairing the Remote
With the power restored, follow the pairing procedure outlined in the manufacturer's instructions. This process often involves pressing a specific button sequence on the remote within a specified timeframe. Successful pairing will typically be indicated by the fan's light flickering or the fan motor activating.
Test the remote control by cycling through the fan speeds and turning the light on and off. Verify that all functions operate as expected.
Troubleshooting Common Issues
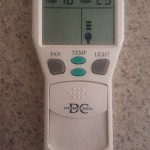
If the remote control fails to operate correctly, check the batteries. Weak batteries can prevent the remote from transmitting signals effectively.
Verify the dip switch settings on both the remote and the receiver unit. These small switches control the frequency at which the remote and receiver communicate. Ensure the dip switch settings match precisely.
Confirm the correct wiring connections between the receiver unit and the fan. Loose or incorrect connections can prevent the remote from functioning properly.
Consult the troubleshooting section of the manufacturer's instructions for further assistance. This section typically addresses common issues and provides specific solutions.
Replacing an Existing Remote
If replacing an existing remote, first remove the batteries from the old remote. Then, access the receiver unit within the fan canopy.
Locate the learn button on the receiver unit. Press and hold the learn button while simultaneously pressing a button on the new remote. Release both buttons when the fan light flickers or the motor activates, indicating successful pairing.
Test all functions of the new remote to ensure proper operation.
Working with Different Remote Types
Different remote control types exist, including handheld remotes, wall-mounted controls, and smart home integrated systems. Handheld remotes offer portability, while wall-mounted controls provide a stationary control point. Smart home integration allows control via smartphone applications and voice assistants.
The installation process for different remote types may vary. Always consult the manufacturer's instructions for the specific remote control model. These instructions will provide detailed guidance for the specific type being installed.
Safety Considerations
Throughout the installation process, prioritize safety. Always disconnect the power before working with electrical wiring.
If unsure about any aspect of the installation, consult a qualified electrician. Professional assistance ensures safe and correct installation, preventing potential hazards.
Regularly inspect the wiring and connections of the ceiling fan and remote control system. Loose connections or damaged wiring can pose safety risks and should be addressed promptly.

How To Wire A Ceiling Fan Control Using Dimmer Switch

How To Install A Ceiling Fan Remote Extreme Diy

How Do I Install New Hunter Ceiling Fan With Remote Control And Still Have Switch Wall For The Light Separately R Homemaintenance

Converting An Existing Ceiling Fan To A Remote Control

Ceiling Fan Remote Control Information Do You Need A

Ceiling Fan Control With Reverse Hardware Home Assistant Community

Ceiling Fans With Remote To Or Not

Rf Remote Ceiling Fan Controller Touch Screen Westinghouse 77841

Hunter Universal 3 Sd Damp Rated Ceiling Fan Handheld Remote Control White 99392 The Home Depot

Ceiling Fan Lamp Remote Controller Kit 23a 12v Battery And Bracket 123 Led Lighting
Related Posts