How to Take Off Light Cover on Ceiling Fan
Ceiling fans are perfect additions to any home, providing much-needed air circulation and illumination. However, dust and dirt can accumulate on the light cover over time, making the fan inefficient and diminishing the amount of light it emits. Fortunately, removing the light cover for cleaning and maintenance is a simple task that can be completed in just a few minutes.
Materials Needed:
* Step ladder or sturdy chair * Screwdriver (Phillips or flathead, depending on the fan model)Safety Precautions:
* Turn off the power to the ceiling fan at the circuit breaker or fuse box. * Allow the fan to come to a complete stop before proceeding.Step-by-Step Instructions:
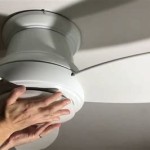
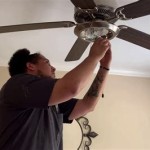
1. Access the Light Cover: Use the step ladder or chair to reach the ceiling fan. Locate the light cover, which is usually held in place by screws or clips. 2. Identify the Screws or Clips: Inspect the light cover to determine how it is attached. Most light covers are secured with screws, which require a screwdriver to remove. Some models may have clips that can be released by hand. 3. Remove the Screws or Clips: If the light cover is secured with screws, use the appropriate screwdriver to loosen and remove them. If clips are present, gently pry them open with your fingers. 4. Detach the Light Cover: Once the screws or clips have been removed, carefully lift the light cover straight up and off the fan. Be mindful not to drop the cover or damage the fan blades. 5. Clean the Light Cover: Use a soft cloth or sponge to gently wipe down the light cover, removing any dust or dirt. If the cover is particularly dirty, you can use a mild cleaning solution or disinfectant. 6. Reattach the Light Cover: Align the light cover with the fan and carefully lower it into place. Secure the cover with the screws or clips you removed earlier, ensuring they are tightened securely. 7. Turn on the Power: Return to the circuit breaker or fuse box and restore power to the ceiling fan. Test the light to ensure it is working properly.Tips:
* Clean the light cover regularly to prevent dust and dirt accumulation. * If the light cover is discolored or damaged, it may need to be replaced. * If you encounter any difficulties or have concerns, consult with a qualified electrician. By following these simple steps, you can effectively remove the light cover on your ceiling fan for cleaning and maintenance, ensuring optimal performance and illumination in your home.
4 Ways To Replace A Light Bulb In Ceiling Fan Wikihow

How To Remove A Ceiling Fan Krueger Electric

Simple Tips To Help Remove A Stuck Glass Ceiling Fan Light Cover

How To Remove A Ceiling Fan Temecula Handyman

How To Remove Light Cover From Ceiling Tiktok Search

How To Replace A Ceiling Fan Part I Makely

4 Ways To Replace A Light Bulb In Ceiling Fan Wikihow

How To Remove A Ceiling Fan Homeserve Usa

How To Remove Ceiling Light Cover A Simple Process Homes Valy

Ceiling Fan Light Removal Cap By Jurassic73 Free Stl Model Printables Com
Related Posts


