Wiring a ceiling fan and light with diagrams ptr diagram for ceilingfanslight remotecontrolceilingfans bladelessceilingfan kidsceilingfan kit switch installation how to electrical 101 install

Wiring A Ceiling Fan And Light With Diagrams Ptr

Wiring A Ceiling Fan And Light With Diagrams Ptr

Wiring A Ceiling Fan And Light With Diagrams Ptr

Wiring A Ceiling Fan And Light With Diagrams Ptr

Wiring A Ceiling Fan And Light With Diagrams Ptr

Wiring Diagram For Ceilingfanslight Remotecontrolceilingfans Bladelessceilingfan Kidsceilingfan Ceiling Fan Light Kit Switch

Wiring A Ceiling Fan And Light With Diagrams Ptr

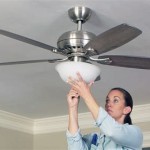
Ceiling Fan Light Kit Installation How To

Ceiling Fan Switch Wiring Electrical 101

How To Install A Ceiling Fan Light Kit

Wiring Diagrams For A Ceiling Fan And Light Kit Electrical

How To Install A Ceiling Fan Wiring The Light Kit For Installation

Replace A Light Fixture With Ceiling Fan Electrical Wiring Home

How To Install A Hampton Bay Ceiling Fan Light Kit Fans Lighting Patio F Kits

What Is The Blue Wire On A Ceiling Fan Wiring Explained Advanced Systems Light Kit With

Wiring Diagram For Ceiling Fan With Light Bookingritzcarlton Info Kit Switch

Changing Ceiling Fan Light Kit Doityourself Com Community Forums

How To Install The Hampton Bay 4 Light Universal Ceiling Fan Kit

How To Wire A Ceiling Fan The Home Depot

Ceiling Fan Wiring Diagram Switch Loop
Wiring a ceiling fan and light with kit installation how to switch electrical 101 install