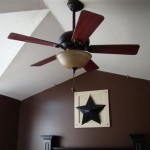
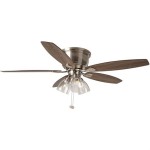
How To Wire A Ceiling Fan With Light On 2 Switches
Installing a ceiling fan with a light that can be controlled by two switches requires careful planning and execution. Here's a step-by-step guide to help you wire a ceiling fan with a light on two switches:
Step 1: Gather the Necessary Materials
Before starting, ensure you have all the necessary materials and tools:
- Ceiling fan with light
- Electrical box and mounting bracket
- Two separate light switches
- Electrical wire (14-gauge solid or stranded copper)
- Wire connectors (such as wire nuts)
- Screwdriver
- Pliers
- Voltage tester
- Safety goggles
- Safety gloves
Step 2: Turn Off the Power
Ensure the circuit that powers the ceiling fan and light is turned off at the circuit breaker or fuse box. This is a crucial safety precaution to prevent electric shock during installation.
Step 3: Install the Electrical Box and Mounting Bracket
Locate the desired location for the ceiling fan and light. Ensure the electrical box is securely attached to the ceiling joists using the provided screws or bolts. Install the mounting bracket on the electrical box according to the fan's instructions.
Step 4: Prepare the Electrical Wires
Cut the electrical wire into appropriate lengths based on your ceiling height and the distance to the switch locations. Strip the ends of the wire approximately 1 inch using a wire stripper.
Step 5: Wire the Ceiling Fan
Follow the wiring diagram provided with the ceiling fan to make the necessary connections. In general, there will be separate wires for the fan motor, light fixture, and ground. Make sure to connect the wires of the same color together using wire connectors and secure them with a screwdriver.
Step 6: Install the Ceiling Fan
With the fan wired correctly, carefully lift it onto the mounting bracket and secure it according to the fan's instructions. Ensure the fan is level and stable before proceeding.
Step 7: Wire the Light Switches
At the switch locations, connect the electrical wires from the ceiling fan to the two separate switches. Typically, one switch will control the fan motor and the other will control the light fixture. Refer to the wiring diagram and use wire connectors to make the necessary connections.
Step 8: Test the Installation
Restore power to the circuit and turn on the light switches. Ensure that the fan and light are working correctly and the switches control them independently. Use a voltage tester to verify that there is no live voltage where it should not be.
Step 9: Secure the Wires and Clean Up
Secure all the wires using wire clamps or electrical tape to ensure they are neat and organized. Tuck any excess wire into the electrical box or ceiling canopy. Clean up the work area and remove any debris.
Remember that working with electricity requires caution and proper safety measures. If you are not comfortable with electrical work or have doubts about any step, it is advisable to consult a qualified electrician for assistance.

Ceiling Fan Wiring Diagram Two Switches

Wiring A Ceiling Fan And Light With Diagrams Ptr

Wiring A Ceiling Fan And Light With Diagrams Ptr

How To Install A Ceiling Fan Two Wall Switches What Bb Built

Help Needed On Going From Fan W Light With Two Switches To And Separate Lights Same R Askanelectrician

How To Wire A Ceiling Fan Control Using Dimmer Switch

Wiring A Ceiling Fan And Light With Diagrams Ptr

Need Feedback On Wiring Fan And Switch With Smartswitches Projects Stories Smartthings Community

Ceiling Fan Switch Wiring Electrical 101

How To Wire A Ceiling Fan Control Using Dimmer Switch
Related Posts


