How To Wire A Ceiling Fan With Three Wires
Installing a ceiling fan can enhance the ventilation and aesthetics of a room. However, the wiring process might seem daunting, particularly when dealing with three wires. Understanding the basics of electrical wiring can simplify the installation. In this article, we'll guide you through the essential steps on how to wire a ceiling fan with three wires. We will cover the materials needed, safety precautions, and step-by-step instructions to ensure a successful installation.
Materials Required:
- Ceiling fan with three wires
- Electrical tape
- Wire nuts
- Screwdriver
- Voltage tester
- Ceiling fan mounting bracket
- Electrical box
Safety Precautions:
Electrical work can be hazardous if not handled properly. Here are some safety precautions to follow while wiring a ceiling fan with three wires:
- Turn off the power at the main breaker or fuse box before starting any electrical work.
- Use a voltage tester to confirm that the wires are not energized before touching them.
- Wear insulated gloves and safety glasses for protection.
- If you are not comfortable with electrical work, it is advisable to consult a qualified electrician.
Step-by-Step Instructions:
- Mount the Ceiling Fan Bracket: Secure the ceiling fan mounting bracket to the electrical box in the ceiling.
- Identify the Wires: Most ceiling fans with three wires have a black wire (hot), white wire (neutral), and ground wire (bare copper or green). Identify these wires for proper connections.
- Connect the Ground Wire: The ground wire from the ceiling fan should be connected to the ground wire (bare copper or green) from the electrical box using a wire nut.
- Connect the Hot Wire: Connect the black wire from the ceiling fan to the black wire from the electrical box using a wire nut.
- Connect the Neutral Wire: Connect the white wire from the ceiling fan to the white wire from the electrical box using a wire nut.
- Secure the Wires: Tuck the wires neatly into the electrical box and secure them with electrical tape.
- Hang the Ceiling Fan: Mount the ceiling fan onto the mounting bracket and tighten the screws to secure it in place.
- Restore Power: Turn the power back on at the main breaker or fuse box.
- Test the Ceiling Fan: Turn on the ceiling fan and check if it is functioning correctly.
Additional Tips:
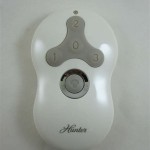
- If your ceiling fan has a remote control, the receiver will need to be connected to the wires between the ceiling fan and the electrical box.
- Some ceiling fans may have additional wires for light fixtures or speed control. Refer to the manufacturer's instructions for specific wiring requirements.
- If you encounter any difficulties during the installation, do not hesitate to consult a qualified electrician for assistance.
Conclusion:
Wiring a ceiling fan with three wires requires attention to detail and adherence to safety guidelines. By following the steps outlined in this article and taking the necessary precautions, you can successfully install your ceiling fan and enjoy its benefits. Remember to always prioritize safety and consult an electrician if any uncertainties arise during the process. With proper planning and execution, you can add style and functionality to your room with a well-wired ceiling fan.

Wiring A Ceiling Fan And Light With Diagrams Ptr

Wiring A Ceiling Fan And Light With Diagrams Ptr

Installing A New Ceiling Fan With Three Wires Have Four Coming Out Of The Which Goes To R Fixit

How To Wire A Ceiling Fan Temecula Handyman

Replacing A Ceiling Fan Light With Regular Fixture Jlc

How To Wire A Ceiling Fan For Separate Control Fo The And Light
Wiring A Ceiling Fan With Two Switches

Charleston Home Inspector Explains How To Wire A Three Way Switch For Ceiling Fan Blue Palmetto Inspection

How To Replace A Capacitor In Ceiling Fan 3 Ways

How To Wire 3 Sd Fan Switch
Related Posts


