How to Wire a Hunter Ceiling Fan with Remote
Installing a Hunter ceiling fan with remote control can be a great way to improve the comfort and convenience of your home. With the remote, you can easily adjust the fan speed and direction, as well as turn the light on and off. Here are the essential steps on how to wire a Hunter ceiling fan with remote:
Step 1: Gather the necessary materials
Before you begin, gather all the necessary materials. You will need the following:
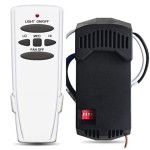
- Hunter ceiling fan with remote
- Mounting hardware
- Electrical wire
- Wire connectors
- screwdriver
Step 2: Turn off the power
Before you do any electrical work, always turn off the power at the circuit breaker panel. This will help to prevent electrical shock.
Step 3: Install the mounting bracket
The first step is to install the mounting bracket on the ceiling. The mounting bracket will support the weight of the fan, so it is important to make sure it is securely installed. Follow the instructions that came with your fan to install the mounting bracket.
Step 4: Wire the fan
Once the mounting bracket is installed, you can begin to wire the fan. The wiring diagram for your fan will be included in the instructions that came with your fan. Follow the instructions carefully to connect the wires to the correct terminals on the fan. Use the wire connectors to secure the connections.
Step 5: Install the fan
Once the fan is wired, you can install it on the mounting bracket. Carefully lift the fan into place and secure it with the screws that came with your fan.
Step 6: Attach the blades
The next step is to attach the blades to the fan. The blades will typically be attached with screws. Tighten the screws securely, but do not overtighten them.
Step 7: Install the light kit
If your fan has a light kit, you will need to install it now. Follow the instructions that came with your fan to install the light kit.
Step 8: Turn on the power
Once the fan is completely installed, you can turn on the power at the circuit breaker panel. Test the fan to make sure it is working properly.
Step 9: Program the remote
Finally, you need to program the remote to control the fan. Follow the instructions that came with your remote to program it.
That's it! You have now successfully wired a Hunter ceiling fan with remote. Enjoy the added comfort and convenience of your new fan.

I Am Installing A Remote To Ceiling Fan Where Does The Red Wire Go Quora

Bypass Hunter Fan Receiver Doityourself Com Community Forums

How Do I Install New Hunter Ceiling Fan With Remote Control And Still Have Switch Wall For The Light Separately R Homemaintenance

How To Wire A Ceiling Fan Control Using Dimmer Switch

How To Install A Hunter Ceiling Fan With Remote Know The Right Way

How To Install Your Ceiling Fan Hunter Latinoamerica

Ceiling Fan Remote With 2 Wires Doityourself Com Community Forums

How To Connect Wiring For Ceiling Fan With Remote Receiver Connection Two Switches Manual Only Shows Method Single Switch R Askanelectrician

Converting An Existing Ceiling Fan To A Remote Control

3 Way Wiring Ceiling Fan With Remote For Two Wire Diy Home Improvement Forum