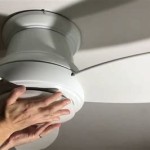
How To Wire Ceiling Light: Essential Aspects
Upgrading your home's lighting fixtures can add a touch of elegance and improve the functionality of your living spaces. Installing a ceiling light is a relatively straightforward task that can be completed with the right tools and safety precautions. Here's a comprehensive guide to help you wire a ceiling light safely and efficiently.
Safety First
Before you begin any electrical work, it's crucial to ensure your safety. Make sure the power is turned off at the breaker panel. Use a non-contact voltage tester to verify that there is no electricity flowing through the wires before touching them. Wear safety gloves and safety glasses for protection.
Gather Your Tools and Materials
To wire a ceiling light, you'll need the following tools and materials:
- Phillips head screwdriver
- Wire strippers
- Electrical tape li>Ceiling light fixture
- Wire nuts
- Ceiling box
- Mounting screws
Identify the Wires
Once the power is turned off, locate the wires in the ceiling box. Typically, there will be three wires: black (hot), white (neutral), and bare copper or green (ground). Use a wire stripper to remove about half an inch of insulation from the ends of the wires.
Connect the Wires
Connect the black wire from the ceiling to the black wire from the fixture. Connect the white wire from the ceiling to the white wire from the fixture. Twist the bare ends of the ground wires together and secure them with a wire nut.
Install the Mounting Plate
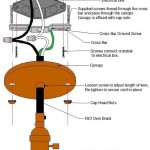
Align the mounting plate of the ceiling light fixture with the ceiling box. Secure the plate to the box using the provided mounting screws.
Mount the Light Fixture
Connect the fixture to the mounting plate by sliding it onto the plate and rotating it clockwise until it locks into place. Make sure the fixture is securely attached before turning the power back on.
Test the Light
Turn the power back on at the breaker panel. Flip the switch that controls the ceiling light to ensure that it works properly. If the light does not turn on, check the connections and make sure everything is wired correctly.
Tips for a Successful Installation
Here are some additional tips for a successful ceiling light installation:
- Use wirenuts of the appropriate size for the gauge of the wires you are connecting.
- Wrap the electrical tape tightly around the wire connections to ensure a secure seal.
- Make sure the ceiling box is securely mounted to the ceiling joists.
- If you are not comfortable working with electricity, consult a qualified electrician for assistance.
By following these steps and taking the necessary safety precautions, you can safely and efficiently install a ceiling light in your home. Whether you are updating a single fixture or upgrading the entire lighting system, a well-installed ceiling light can enhance the ambiance and functionality of your living spaces.

Wiring A Ceiling Fan And Light With Diagrams Ptr

Jim Lawrence Flush Lights Fitting Guide

Replacing A Ceiling Fan Light With Regular Fixture Jlc

How To Install A Ceiling Light Fixture Diy Family Handyman

Mounting Light Fixtures Fine Homebuilding

Inside The Circuit Pendant Lighting Light Switch Wiring Homeowner Faqs

How To Install A Ceiling Light Fixture Diy Family Handyman

Extending A Lighting Circuit Step By Guide And

How To Hang A Ceiling Light
Replacing A Ceiling Fan Light With Regular Fixture Jlc
Related Posts

