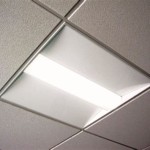
How to Wire Dimmable LED Ceiling Lights
Dimmable LED ceiling lights can add an elegant and functional touch to any room. They provide customizable lighting levels, creating the perfect ambiance for different moods and activities. Wiring dimmable LED ceiling lights is a relatively simple process, but it requires careful attention to detail.
Materials Needed:
- Dimmable LED ceiling light
- Electrical wire
- Wire strippers
- Electrical tape
- Screwdriver
- Voltage tester
- Dimmer switch (if not included with the light)
Safety Precautions:
Before starting any electrical work, it is essential to take safety precautions. Turn off the power to the circuit where you will be working using the circuit breaker panel. Verify that the power is off by using a voltage tester. Wear safety glasses and gloves to protect yourself from potential hazards.
Step-by-Step Guide:
- Identify the Wires: Locate the wires coming from the ceiling. A typical ceiling light junction box will have three wires: black (hot), white (neutral), and green or bare copper (ground).
- Prepare the Light: Remove the canopy from the light fixture by unscrewing the screws or nuts holding it in place. Identify the wires coming from the light: black, white, and green or bare copper.
- Connect the Ground Wire: Twist the green or bare copper ground wires from the ceiling and the light together. Wrap electrical tape around the connection to secure it.
- Connect the Neutral Wire: Twist the white neutral wires from the ceiling and the light together. Wrap electrical tape around the connection to secure it.
- Connect the Hot Wire: Remove about an inch of insulation from the ends of the black wires from the ceiling and the light. Twist the exposed copper wires together and wrap electrical tape around the connection to secure it.
- Test the Connection: Turn on the power at the circuit breaker panel and use a voltage tester to check the connection. Touch one probe to the neutral wire and the other probe to the black wire. If the tester lights up, the connection is successful.
- Install the Light: Carefully lift the light fixture up to the ceiling junction box and align the screw holes. Secure the light by screwing in the mounting screws or nuts.
- Install the Dimmer Switch (if necessary): If the light did not come with a built-in dimmer, install a compatible dimmer switch according to the manufacturer's instructions.
Tips:
- Ensure that the dimmer switch you choose is compatible with the LED ceiling light.
- Avoid using dimmers with a low wattage rating for LED lights.
- If you encounter any difficulties during the wiring process, consult an electrician for assistance.
By following these steps and safety precautions, you can successfully wire dimmable LED ceiling lights and enjoy the benefits of adjustable lighting in your home.

Ceiling Fan Wiring Diagram With Light Dimmer

Low Voltage Led 0 10v Dimming Usai

Dimmer Switch Wiring Electrical 101

Led Ceiling Lights For Van Conversion Acegoo 12v 3 Watts Dimmable Recessed Puck Faroutride

88light Dimmable Led Puck Light Wiring Diagrams

Lumos Controls 0 10v Wiring It S Not As Difficult You Think

Connecting Cur Controlled Led Spotlights Do S And Don Ts Customer Service Q

Lumos Controls 0 10v Wiring It S Not As Difficult You Think

How To Dim Your Leds Top 3 Solutions For Smooth Led Control Ledsupply Blog

2 Way Switch And Dimming With Led Lights Threecubes