How to Wire Separate Switches for Ceiling Fan and Light
Installing a ceiling fan with a separate light fixture is a great way to add both style and functionality to a room. However, wiring it correctly can be a bit tricky if you're not sure what you're doing. That's why we've put together this guide on how to wire separate switches for a ceiling fan and light.
Materials You'll Need
- Ceiling fan with light fixture
- Two electrical switches (one for the fan, one for the light)
- Electrical wire (14-gauge or 12-gauge)
- Wire nuts
- Screwdriver
- Electrical tape
Step-by-Step Instructions
1. Turn off the power at the breaker box. This is essential for safety before you begin any electrical work.
2. Install the ceiling fan and light fixture. Follow the manufacturer's instructions for mounting the fan and light fixture to the ceiling.
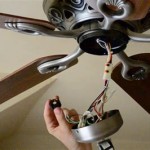
3. Identify the wires. Once the fan and light fixture are installed, you'll need to identify the wires. The wires will be color-coded, with black wires being used for hot wires, white wires being used for neutral wires, and green or bare copper wires being used for ground wires.
4. Connect the wires. Start by connecting the black wire from the fan to the black wire from the switch. Then, connect the white wire from the fan to the white wire from the switch. Finally, connect the green or bare copper wire from the fan to the green or bare copper wire from the switch box.
5. Repeat the process for the light fixture. Connect the black wire from the light fixture to the black wire from the switch, the white wire from the light fixture to the white wire from the switch, and the green or bare copper wire from the light fixture to the green or bare copper wire from the switch box.
6. Secure the wire nuts. Once the wires are connected, use wire nuts to secure them. Twist the wire nuts clockwise until they are tight.
7. Wrap the wires with electrical tape. Once the wire nuts are secured, wrap the wires with electrical tape to insulate them.
8. Turn on the power at the breaker box. Once the wires are connected and insulated, turn on the power at the breaker box.
9. Test the switches. Flip the switches to make sure that the fan and light are working properly.
Tips
- If you're not sure how to wire a ceiling fan and light fixture, it's best to hire a qualified electrician.
- Make sure to use the correct gauge wire for your application. 14-gauge wire is typically used for ceiling fans, while 12-gauge wire is typically used for light fixtures.
- Be sure to connect the wires correctly. If the wires are not connected correctly, the fan or light fixture may not work properly or could even be a fire hazard.

Wiring A Ceiling Fan And Light With Diagrams Ptr

How To Wire A Ceiling Fan For Separate Control Fo The And Light

Ceiling Fan Wiring Diagram Two Switches

Wiring A Ceiling Fan And Light With Diagrams Ptr

How To Install A Ceiling Fan Two Wall Switches What Bb Built

How To Wire A Ceiling Fan Control Using Dimmer Switch
How Should I Connect The Wiring For Fans And Lights To Separate Control Switches Quora

How To Wire A Fan With Separate Light Switch

Need Feedback On Wiring Fan And Switch With Smartswitches Projects Stories Smartthings Community

How To Wire A Ceiling Fan Control Using Dimmer Switch
Related Posts

