How To Wire Up A Ceiling Fan Without Light
Installing a ceiling fan without light is a relatively simple task that can be completed in a few hours with the right tools and materials. By following these step-by-step instructions, you can ensure a safe and successful installation.
Materials You'll Need :
- Ceiling fan
- Electrical wire (14-gauge or 12-gauge)
- Electrical tape
- Wire nuts
- Screwdriver
- Drill
- Mounting bracket
- Outlet box
Step 1: Turn Off the Power
Before you begin any electrical work, it is crucial to turn off the power supply to the room where you'll be installing the fan. Locate the circuit breaker panel and switch off the breaker that controls the power to the ceiling fan circuit.
Step 2: Install the Mounting Bracket
Locate the center of the ceiling where you want to install the fan. Use the mounting bracket that came with the fan to mark the location of the mounting screws. Drill pilot holes for the screws, then secure the mounting bracket to the ceiling joists using the provided screws.
Step 3: Install the Outlet Box
The outlet box will house the electrical connections for the fan. Attach the outlet box to the mounting bracket using the screws provided. Make sure the outlet box is level and securely fastened.
Step 4: Run the Electrical Wire
From the outlet box, run the electrical wire through the conduit or cable channel to the fan's motor housing. Ensure that the wire is long enough to reach the motor housing without being taut.
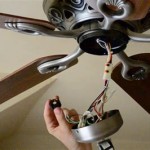
Step 5: Connect the Electrical Wires
Inside the motor housing, connect the electrical wires to the fan's motor leads. Typically, the black wire connects to the black lead, the white wire connects to the white lead, and the green or bare copper wire connects to the ground lead. Secure the connections with wire nuts and electrical tape to ensure a solid connection.
Step 6: Mount the Fan
Lift the fan into place and align it with the mounting bracket. Secure the fan to the mounting bracket using the provided screws. Make sure the fan is securely fastened and level.
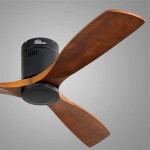
Step 7: Install the Blades
Attach the fan blades to the motor housing according to the manufacturer's instructions. Ensure that the blades are securely fastened and balanced.
Step 8: Turn On the Power
Return to the circuit breaker panel and turn on the power to the ceiling fan circuit. Test the fan to ensure it operates correctly and the blades rotate smoothly.
Tips:
- If you are not comfortable working with electricity, it is recommended to hire a qualified electrician to perform the installation.
- Always refer to the manufacturer's instructions for specific wiring diagrams and installation details.
- Ensure that all electrical connections are tight and secure to prevent any electrical hazards.
- Consider the height of the ceiling when choosing a fan. A fan that is too high may not provide adequate airflow, while a fan that is too low may pose a safety hazard.
By following these instructions carefully, you can successfully wire up a ceiling fan without light and enjoy the benefits of improved air circulation and cooling in your home.

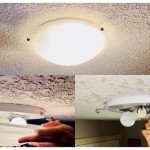
Replacing A Ceiling Fan Light With Regular Fixture Jlc

How To Wire A Ceiling Fan Temecula Handyman

How To Wire A Ceiling Fan Control Using Dimmer Switch

Wiring A Ceiling Fan And Light With Diagrams Ptr

Wiring A Ceiling Fan Light Part 1

Replacing A Ceiling Fan Light With Regular Fixture Jlc

Wiring A Ceiling Fan Light Part 1

Wiring A Ceiling Fan And Light With Diagrams Ptr

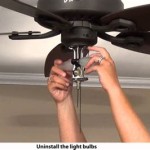
4 Ways To Replace A Light Bulb In Ceiling Fan Wikihow

How To Wire A Ceiling Fan The Home Depot
Related Posts