How to wire a ceiling fan control using dimmer switch with remote wiring receiver install what do i the red from when hooking up attached light and quora two wall switches bb built diagrams ptr diagram connection complete guide can w only connected things smartthings community

How To Wire A Ceiling Fan Control Using Dimmer Switch With Remote Wiring

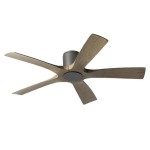
How To Wire A Ceiling Fan With Remote Receiver

How To Wire A Ceiling Fan Control Using Dimmer Switch

How To Install A Ceiling Fan With Remote Control

What Do I With The Red Wire From Ceiling When Hooking Up A Fan Attached Light And Remote Quora

How To Install A Ceiling Fan Two Wall Switches What Bb Built

Wiring A Ceiling Fan And Light With Diagrams Ptr

Remote Control Ceiling Fan Wiring Diagram And Connection

How To Wiring A Ceiling Fan With Light And Remote Control Complete Guide

How To Wire A Ceiling Fan Control Using Dimmer Switch

Can I Control A Ceiling Fan W Remote Only Connected Things Smartthings Community

How To Install A Ceiling Fan Remote Diy Family Handyman

How To Wire A Ceiling Fan For Separate Control Fo The And Light

Converting Remote Operated Fan To 2 Wall Switches Doityourself Com Community Forums

Ceiling Fan Remote Conversion Original Connections Wiring Controller With

How To Install A Ceiling Fan Remote Diy Family Handyman

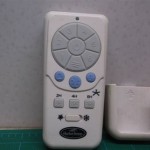
Universal Uc9050t Ceiling Fan Wall Remote Control Dip Switch With Adjustable 3 Sd Light Dimmer Requires Receiver No Included Compatible Hampton Bay Harbor Breeze Hunter Com

Remote Controlled Ceiling Fan Regulator Circuit Homemade Projects

I Bought A New Ceiling Fan With Light That Has Wired Remote Switch There Is Receiver To The House Wiring
Ceiling fan wiring with a remote receiver how to wire control when hooking up two wall switches and light can i w
Related Posts