Hunter Ceiling Fan 3 Way Switch Wiring Diagram

By | May 5, 2020

Hunter Ceiling Fan 3 Way Switch Wiring Diagram

Installing a Hunter ceiling fan with a 3-way switch can enhance the ambiance of your home. Here's a comprehensive guide to help you navigate the wiring process:

Materials Required:

  • Hunter ceiling fan
  • 3-way switch
  • Wire nuts
  • Electrical tape
  • Screwdriver
  • Wire strippers

Step-by-Step Instructions:

1. Safety Precautions:

Turn off the power at the breaker box before starting any electrical work. Test the wires using a voltage tester to ensure they are de-energized.

2. Identifying the Wires:

Each switch will have three terminals: common (COM), traveler 1 (TR1), and traveler 2 (TR2). The black wire is typically used as the common, while the red and white wires are travelers. The ground wire is green or bare copper.

3. Wiring the Fan:

Connect the blue wire from the fan to the common terminal on the wall switch. The black wire from the fan connects to the black common wire in the electrical box. For speed and light control, refer to the manufacturer's instructions for specific wire connections.

4. Wiring the Switches:

At each switch location, connect the common wire from the power source to the COM terminal. Connect one traveler (TR1) wire to the COM terminal on the other switch. Connect the other traveler (TR2) wire to the remaining terminal on the other switch.

5. Grounding:

Connect the bare copper or green ground wire from the fan to the ground wire in the electrical box. Ensure all ground connections are secure.

6. Securing Connections:

Twist the exposed wire ends together and secure them with wire nuts. Cover the wire nuts with electrical tape for insulation.

7. Reinstalling the Switches and Fan:

Push the wires back into the electrical boxes and reinstall the switch plates. Securely mount the fan back onto the ceiling.

8. Testing the Fan:

Turn on the power at the breaker box and operate the switches to ensure the fan is functioning correctly. If you encounter any issues, recheck the wiring connections carefully.

Tips:

  • Follow the manufacturer's instructions carefully for specific wiring details.
  • Use a voltage tester to verify the wires are de-energized before working.
  • Secure all electrical connections tightly to prevent potential hazards.
  • If you are not confident in performing electrical work, consult a qualified electrician.

Conclusion:

Installing a 3-way switch for your Hunter ceiling fan is a rewarding project that can significantly improve your home's lighting and ventilation control. By following the steps outlined in this guide and adhering to safety precautions, you can successfully complete the wiring process.


Wiring For A Hunter C17 Ceiling Fan

Wiring For A Hunter C17 Ceiling Fan Pre 1950 Antique Collectors Association Afca Forums

Wiring A Ceiling Fan And Light With

Wiring A Ceiling Fan And Light With Diagrams Ptr

Ceiling Fand Wiring Diagrams

Ceiling Fand Wiring Diagrams

Hunter Fans Internal Wiring And Data

Hunter Fans Internal Wiring And Data

3 Way Wiring Ceiling Fan With Remote

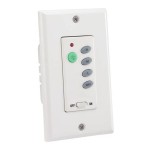
3 Way Wiring Ceiling Fan With Remote For Two Wire Diy Home Improvement Forum

Three Way Switch For A Ceiling Fan

Charleston Home Inspector Explains How To Wire A Three Way Switch For Ceiling Fan Blue Palmetto Inspection
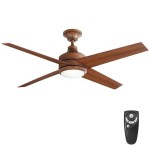
Fan Wiring Diagrams Etc

Fan Wiring Diagrams Etc

Zing Ear Ze 268s6 Wiring Instructions

Zing Ear Ze 268s6 Wiring Instructions Ceilingfanswitch Com

3 Sd Ceiling Fan Pull Chain Switch

3 Sd Ceiling Fan Pull Chain Switch Wiring Pickhvac

Hunter Switch 1 Ceiling Fan Zing

Hunter Switch 1 Ceiling Fan Zing Ear Pull Chain Ze 268s6 3 Sd 4 Wire Control Replacement Co


Leave a Reply

Your email address will not be published. Required fields are marked *

This site uses Akismet to reduce spam. Learn how your comment data is processed.