Essential Aspects of Installing a Ceiling Fan Where a Light Was
Upgrading your home's lighting and ventilation can be as simple as installing a ceiling fan. However, it becomes slightly more complex when you're replacing an existing light fixture with a fan. Here's a step-by-step guide to ensure a successful installation:
Safety First
Before starting, turn off the power at the circuit breaker or fuse box. Verify that the electricity is off by testing the light switch.
Remove the Light Fixture
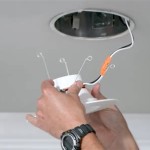
Remove the glass globe or shade, unscrew the light bulb, and detach any trim or decorative pieces. Next, identify the junction box holding the electrical wires. Disconnect the wires from the light fixture, noting which wires connect to which terminals.
Prepare the Electrical Box
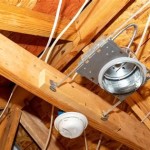
Inspect the electrical box to ensure it's rated for the ceiling fan's weight. If necessary, upgrade to an appropriate box rated for the fan's weight.
Mount the Fan Bracket
Locate the mounting bracket that came with the ceiling fan. Position the bracket over the junction box and align it according to the fan's mounting instructions. Secure the bracket using the provided screws.
Connect the Electrical Wires
Reconnecting the electrical wires is crucial. Connect the black wire from the fan to the black wire from the ceiling, the white wire from the fan to the white wire from the ceiling, and the bare or green ground wire from the fan to the ground wire from the ceiling. Use wire nuts to secure the connections.
Mount the Ceiling Fan
Lift the ceiling fan and position it securely on the mounting bracket. Align the holes on the fan's canopy with the holes on the bracket and insert the provided screws to fasten it firmly.
Install the Blades
Attach the ceiling fan blades by following the manufacturer's instructions. Each blade is typically secured with screws or a locking mechanism.
Slide on the Globe or Shade
Reinstall the glass globe or shade onto the fan, making sure it fits snugly.
Turn on the Power
Restore power at the circuit breaker or fuse box and test the ceiling fan. It should operate smoothly and provide adequate ventilation.
Tips for Success
- Use a licensed electrician if you're unfamiliar with electrical work.
- Follow the manufacturer's instructions carefully for your specific fan model.
- Ensure the blades have adequate clearance from walls, furniture, and other obstacles.
- Consider the fan's CFM rating to choose an appropriate size for your room.
- Regularly clean and maintain your ceiling fan to ensure optimal performance and longevity.

Replacing A Ceiling Fan Light With Regular Fixture Jlc

Wiring A Ceiling Fan And Light With Diagrams Ptr
Replacing A Ceiling Fan Light With Regular Fixture Jlc

Wiring A Ceiling Fan And Light With Diagrams Ptr

How To Replace A Ceiling Fan With Pendant Light

How To Add A Light Kit Your Ceiling Fan Mr Electric

Ceiling Fan Light Kit Installation How To

Wiring A Ceiling Fan And Light With Diagrams Ptr

How To Safely Install A Ceiling Fan In Your Home White Electric Electricians North

Installing A Ceiling Fan Fine Homebuilding
Related Posts


