Light installation in a ceiling tile how to install lighting your kanopi by armstrong recessed lights drop the home depot suspended doityourself com replace dropped design diy tiles part 3 super nova adventures temecula handyman

Light Installation In A Ceiling Tile

How To Install Lighting In Your Ceiling Kanopi By Armstrong

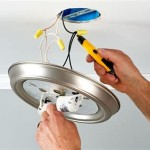
How To Install Recessed Lights In A Drop Ceiling The Home Depot

How To Install Recessed Lights In A Drop Ceiling The Home Depot

Install Lighting In A Suspended Ceiling Doityourself Com

How To Install Lighting In Your Ceiling Kanopi By Armstrong

How To Install Recessed Lights In A Drop Ceiling The Home Depot

How To Replace Recessed Lighting Drop Ceiling Dropped Design

Diy Recessed Lighting Installation In A Drop Ceiling Tiles Part 3 Super Nova Adventures

How To Install Recessed Lights In A Drop Ceiling Temecula Handyman

How To Install Recessed Lights In A Drop Ceiling The Home Depot

Dropped Ceiling Recessed Lighting Basement

How To Install A Drop Ceiling Yourself

How To Install A Drop Ceiling 14 Steps With Pictures Wikihow

Lighting Ceilume

Installing Flush Mount Llight Fixture Into Drop Ceiling Refinish Paint House Remodeling Decorating Construction Energy Use Kitchen Bathroom Bedroom Building Rooms City Data Forum

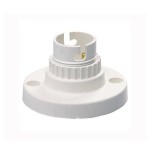
Recessed Lighting Installation Guide

Drop Ceiling Tiles Installation Tips Diy Family Handyman

Drop Ceiling Installation How To Install A Homeserve Usa

Basement Drop Ceiling Tiles Finishing
Light installation in a ceiling tile how to install lighting your recessed lights suspended drop diy