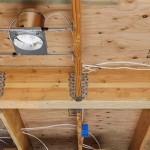
Installing Recessed Lighting in Plaster Ceilings: A Comprehensive Guide
Recessed lighting adds an elegant and sophisticated touch to any home, providing ambient illumination and highlighting architectural features. If you have a plaster ceiling, installing recessed lighting can be a straightforward DIY project with the right preparation and technique. Here's a comprehensive guide to help you achieve professional-looking results:
Planning and Preparation
Before you begin, carefully plan the placement of your recessed lights. Consider the size and shape of the room, furniture arrangement, and desired lighting effect. Mark the locations of the lights on the ceiling with a pencil or chalk.
Gather the necessary materials, including recessed lighting fixtures, electrical wire, junction boxes, and tools such as a drywall saw, drill, and screwdriver. Ensure that the electrical wiring meets local building codes and that you have the appropriate permits, if required.
Creating the Recesses
Using the drywall saw, carefully cut out circular holes in the plaster ceiling at the marked locations. The hole size should correspond to the size of the recessed light fixture.
Once the holes are cut, connect the electrical wires to the junction boxes and feed them into the recesses. Secure the junction boxes inside the ceiling with screws or nails.
Installing the Fixtures
Insert the recessed lighting fixtures into the holes. Most fixtures come with spring-loaded clips that hold them securely in place against the ceiling. Connect the wires from the fixtures to the junction boxes and tighten the terminal screws.
Once the fixtures are connected, push them into the recesses until they are flush with the ceiling. Trim the excess wire and tuck it into the junction boxes.
Plastering and Finishing
If the plaster ceiling is not perfectly smooth around the recessed lights, you may need to apply a thin layer of plaster to blend it seamlessly. Mix a small batch of plaster and carefully spread it around the edges of the lights using a putty knife.
Allow the plaster to dry completely and then sand it smooth with fine-grit sandpaper. Prime and paint the ceiling to match the existing finish.
Tips for Success
- Use a sharp drywall saw to make clean, precise cuts.
- Always wear safety glasses and a dust mask when cutting or sanding plaster.
- Test the lights before installing them permanently to ensure they are working properly.
- If you encounter any electrical issues, consult a qualified electrician.
- Allow the plaster to dry thoroughly before sanding and painting to prevent cracking.
Conclusion
Installing recessed lighting in a plaster ceiling requires precision and attention to detail. By following these steps and tips, you can achieve beautiful and functional results that will enhance the ambiance of your home. Remember to prioritize safety and ensure that you have the necessary skills and materials to complete the project successfully.

8 Recessed Lighting Installation Tips For Diyers Bob Vila

How To Install Recessed Lighting Fixthisbuildthat

Useful Info About Plaster Ceiling Suria Renovation Works

Benefits Of Plasterboard Recessed Downlights Future House

Enolight Recessed Wall Ceiling Drywall Light Fixtures

Plaster In Profile For Wall And Ceilings

Househomerepair Adding Can Lights To A Plaster And Lath Ceiling

Integrated Lighting Styles

Plaster In Profile For Wall And Ceilings

Plaster In Led Strip Profile For Ceiling Edges
Related Posts


