Ceiling fan connection of four wire 4 wiring diagram in 2023 switch light how to a temecula handyman and with diagrams ptr give wires celing capacitor install installation condenser

Ceiling Fan Connection Of Four Wire

4 Wire Ceiling Fan Wiring Diagram In 2023 Switch Light

How To Wire A Ceiling Fan Temecula Handyman

Wiring A Ceiling Fan And Light With Diagrams Ptr

Wiring A Ceiling Fan And Light With Diagrams Ptr

How To Give 4 Wires Ceiling Fan Connection Wiring Celing

Ceiling Fan 4 Wire Connection With Capacitor

Wiring A Ceiling Fan And Light With Diagrams Ptr

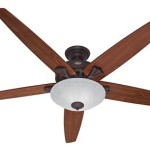
Wire A Ceiling Fan

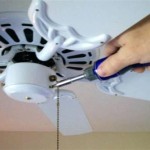
How To Install A Ceiling Fan Installation Wiring

Ceiling Fan 4 Wire Connection With Capacitor Condenser

Wiring A Ceiling Fan And Light With Diagrams Ptr

What Are The Benefits Of Not Having Ground Wires For Ac Wiring Three Way Switches Ceiling Fans Quora

Help 4 Wires For A Bathroom Ceiling Fan Doityourself Com Community Forums

Ceiling Fan 4 Wire Connection With Capacitor Condenser

How To Wire A Ceiling Fan The Home Depot

How To Replace A Capacitor In Ceiling Fan 3 Ways

Wire A Ceiling Fan

Triple Capacitor Four Wire Dan S Fan City Ceiling Fans Parts Accessories
Ceiling fan connection of four wire 4 wiring diagram in how to a temecula and light with celing capacitor installation