Installing a Ceiling Light from Scratch: A Comprehensive Guide
Installing a ceiling light is a crucial home improvement task that can enhance the aesthetics and functionality of any room. Whether you're a seasoned DIY enthusiast or a complete novice, following these comprehensive steps will empower you to tackle this project with confidence and precision.
Materials and Tools
* New ceiling light fixture * Electrical wire (14-gauge or as required by the fixture) * Wire nuts * Electrical tape * Screwdriver * Wire stripper * Ladder * Voltage tester * Safety glassesSafety Precautions
* Always turn off the power at the main electrical panel before beginning any electrical work. * Wear safety glasses and appropriate clothing for protection. * Use caution when working on ladders.Step 1: Prepare the Wiring
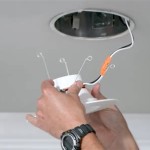
* Remove the existing light fixture, if any. * Locate the electrical wires: the black wire (hot), white wire (neutral), and green or bare wire (ground). * Strip approximately 1/2 inch of insulation from the ends of the wires. * Connect the black wire from the fixture to the black wire from the ceiling, the white wire to the white wire, and the green or bare wire to the green or bare wire. * Secure the connections with wire nuts and electrical tape.Step 2: Mount the Mounting Bracket
* Position the mounting bracket for the new light fixture over the electrical box. * Align the bracket and secure it with screws.Step 3: Install the Fixture
* Connect the wires from the light fixture to the corresponding wires on the mounting bracket, following the same color-coding as before. * Secure the fixture to the mounting bracket according to the manufacturer's instructions.Step 4: Restore Power and Test
* Restore power at the main electrical panel. * Turn on the light switch to verify that the new fixture is functioning properly.Additional Tips
* If you are replacing an existing fixture, it is advisable to check the wattage of the new bulb to ensure compatibility. * For chandeliers or heavy fixtures, consider providing additional support by using a ceiling hook or a stronger mounting mechanism. * If you encounter any electrical issues or are unsure about any step, it is strongly recommended to consult a qualified electrician for assistance.Conclusion
Installing a ceiling light may appear daunting at first, but by following these detailed instructions and adhering to safety precautions, you can successfully illuminate your space with a stylish and functional fixture. Remember, thorough preparation, attention to detail, and safety are paramount for a successful outcome.
How To Install A Ceiling Light Fixture Diy Family Handyman

How To Install A Ceiling Light Fixture Diy Family Handyman

Mounting Light Fixtures Fine Homebuilding

How To Install A Ceiling Light Fixture Diy Family Handyman

How To Install Ceiling Light Homeserve Usa

How To Install A Ceiling Light Fixture Diy Family Handyman

How To Install A Light Fixture Step By The Diy Playbook

How To Install A Vintage Ceiling Light Fixture Simple Decorating Tips

How To Install A Light Fixture 10 Steps With Pictures Wikihow

How To Wire A Ceiling Light And Install New Fixture
Related Posts

