How to install new work recessed lighting the ultimate guide for unfinished basement semigloss design let there be lights renovation update organizing homelife installing inspiration shallow led in a low ceiling remodelaholic can i improve my finished or stkr concepts cover downlights with insulation ideas diy installation drop tiles prep super nova adventures

How To Install New Work Recessed Lighting

The Ultimate Guide For Unfinished Basement Lighting Semigloss Design

Let There Be Lights Basement Renovation Update Organizing Homelife

How To Install New Work Recessed Lighting Installing Basement Inspiration

The Ultimate Guide For Unfinished Basement Lighting Semigloss Design

Installing Shallow Led Lights In A Low Ceiling Remodelaholic

How Can I Improve The Lighting In My Basement Finished Or Unfinished Stkr Concepts

Can I Cover Downlights With Insulation

Unfinished Basement Lighting Ideas Ultimate Guide

How To Install New Work Recessed Lighting

Diy Recessed Lighting Installation In A Drop Ceiling Tiles Prep Work Super Nova Adventures

Pin On Diy Unfinished Basement

How To Choose Basement Lighting Basements Plus

The Ultimate Guide For Unfinished Basement Lighting Semigloss Design

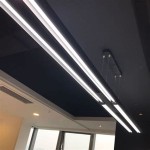
Our Painted Basement Ceiling Black With Photo Examples

How To Layout Recessed Lighting In 5 Simple Steps Tutor

Canned Lighting Conundrum Greenbuildingadvisor

How To Install Recessed Lighting Without Attic Access

How To Put Recessed Lights In The Ceiling

Wiring Basement Lighting Diy Home Improvement Forum
How to install new work recessed lighting unfinished basement lights renovation update installing shallow led in a low ceiling can i improve the my cover downlights with insulation ideas diy installation