Installing Can Lights In Lath And Plaster Ceiling: A Comprehensive Guide
Installing can lights in a lath and plaster ceiling can be a daunting task, but with the right tools and techniques, it's a project that can be tackled by most DIY enthusiasts. Here's a comprehensive guide to help you through the process:
1. Safety First
Before you start, ensure you take all necessary safety precautions. Turn off the power to the circuit you'll be working on, and wear safety glasses and gloves to protect yourself from dust and debris.
2. Gather Your Tools
You will need the following tools:
- Can lights
- Electrical wires
- Electrical box
- Drill
- Hole saw
- Junction box
- Screwdriver
- Wire strippers
3. Determine the Location of Your Lights
Plan the location of your can lights carefully, taking into account the size of the room, the existing lighting, and the placement of furniture and fixtures. Use a measuring tape to mark the center points of each light fixture.
4. Cut the Holes for the Can Lights
Use a hole saw to cut holes in the plaster ceiling that are slightly larger than the diameter of the can lights. Be careful not to cut too deeply, as you could damage the plaster.
5. Install the Electrical Box
Feed the electrical wires through the hole in the ceiling and into the electrical box. Secure the electrical box to the ceiling joists using screws. Twist together the black wires (lives), white wires (neutrals), and bare copper wires (grounds).
6. Connect the Can Lights
Connect the can lights to the wires in the electrical box. The black wire from the can light should be connected to the black wire in the box, the white wire from the can light to the white wire in the box, and the bare copper wire from the can light to the bare copper wire in the box.
7. Install the Can Lights
Push the can lights into the holes in the ceiling. Twist the locking ring on the can light to secure it in place.
8. Install the Light Bulbs
Install the light bulbs into the can lights. Turn on the power and test the lights to ensure they're working properly.
Tips
- Use a dust mask to protect yourself from dust while cutting and drilling.
- Be careful not to overload the electrical circuit. Each circuit can only handle a certain amount of amperage, so don't install too many can lights on a single circuit.
- If you're not comfortable working with electricity, it's best to hire a qualified electrician to install your can lights for you.

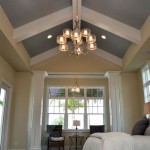
Househomerepair Adding Can Lights To A Plaster And Lath Ceiling

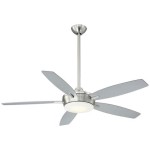
Re Installing Ceiling Fan Plaster And Lath Drywall Doityourself Com Community Forums

What Kind Of Hole Saw Would You Recommend For Drilling On Plaster I Need To Make 6 Holes Lights And This Is A New One Looks Like After The Second

Re Installing Ceiling Fan Plaster And Lath Drywall Doityourself Com Community Forums

Spent Twenty Minutes Telling The Appice How Important It Was That He Didn T Put His Foot Through Lath And Plaster Ceiling Of 300 Year Old Heritage Building We Are Testing Found

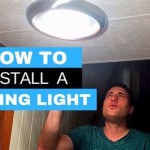
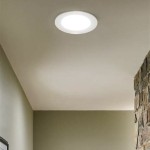
8 Recessed Lighting Installation Tips For Diyers Bob Vila

Delaminating Midcentury Drywall Plaster Hybrid Surface Doityourself Com Community Forums

Lath Plaster Ceilings Repair Plasterwork

Is This Plaster Ceiling Too Far Gone To Save

Replacing Damaged Lathe And Lime Ceiling Period Property
Related Posts