Installing Ceiling Fan And Light Switch

By | August 14, 2019

Installing a Ceiling Fan and Light Switch: A Step-by-Step Guide

Enhancing the functionality and ambiance of your home with a ceiling fan and light switch is a relatively straightforward project. Here's a comprehensive guide to assist you in completing this task safely and efficiently.

Materials Required:

  • Ceiling fan
  • Light switch
  • Wire strippers
  • Electrical tape
  • Screwdriver
  • Safety glasses

Safety Precautions:

Before commencing any electrical work, ensure your safety by adhering to the following precautions:

  • Turn off the circuit breaker or remove the fuse corresponding to the affected area.
  • Wear safety glasses to protect your eyes from debris.
  • Inspect the wiring and connections thoroughly to ensure they are in good condition.
  • Do not hesitate to seek assistance from a qualified electrician if you encounter any difficulties or safety concerns.

Step-by-Step Instructions:

Installing the Ceiling Fan:

1. Locate the junction box in the ceiling and remove the existing light fixture (if any).

2. Mount the ceiling fan bracket to the junction box using the screws provided.

3. Attach the ceiling fan to the bracket and secure it with the screws.

4. Connect the wires from the ceiling fan to the wires in the junction box. Match the colors: black to black, white to white, and green to ground.

5. Secure the wire connections with electrical tape.

6. Install the blades and any other components of the ceiling fan.

7. Turn on the circuit breaker or replace the fuse to power the ceiling fan.

Installing the Light Switch:

1. Remove any faceplates and switches from the existing light switch box.

2. Connect the wires from the light switch to the wires in the switch box. Match the colors: black to black, white to white, and green to ground.

3. Secure the wire connections with electrical tape.

4. Mount the light switch into the switch box and secure it with the screws.

5. Install a faceplate over the light switch.

6. Turn on the circuit breaker or replace the fuse to power the light switch.

Testing the Ceiling Fan and Light Switch:

Flip the light switch to ensure the light is functioning correctly. Next, operate the ceiling fan with the remote control or pull chains to confirm its functionality and proper rotation.

Tips for Installing a Ceiling Fan and Light Switch:

  • Consider the size and height of your room when selecting a ceiling fan.
  • Choose a light switch that matches the decor and style of your home.
  • Use a level to ensure the ceiling fan is mounted evenly.
  • Tighten all screws and connections securely to prevent any electrical hazards.
  • Refer to the manufacturer's instructions for specific installation requirements for your ceiling fan and light switch.

Conclusion:

By following these comprehensive instructions, you can confidently install a ceiling fan and light switch in your home, enhancing its comfort and functionality. Remember to prioritize safety and follow industry standards to ensure a successful installation.


Wire A Ceiling Fan To Light Switch

How To Wire A Ceiling Fan Light Switch Quora

Wiring A Ceiling Fan And Light With

Wiring A Ceiling Fan And Light With Diagrams Ptr

How To Wire A Ceiling Fan Control

How To Wire A Ceiling Fan Control Using Dimmer Switch

How To Wire A Ceiling Fan Control

How To Wire A Ceiling Fan Control Using Dimmer Switch

Need Feedback On Wiring Fan And Switch

Need Feedback On Wiring Fan And Switch With Smartswitches Projects Stories Smartthings Community

Ceiling Fan Switch Wiring Electrical 101

Ceiling Fan Switch Wiring Electrical 101

Replace Light Fixture W Ceiling Fan

Replace Light Fixture W Ceiling Fan R Askanelectrician

How To Wire A Ceiling Fan Control

How To Wire A Ceiling Fan Control Using Dimmer Switch

Ceiling Fan Switch Wiring Electrical 101

Ceiling Fan Switch Wiring Electrical 101

Ceiling Fans Wiring And Installation

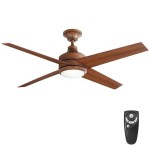
Ceiling Fans Wiring And Installation Pocket Sparky


Leave a Reply

Your email address will not be published. Required fields are marked *

This site uses Akismet to reduce spam. Learn how your comment data is processed.