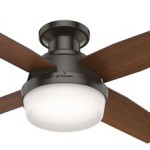
Installing a Ceiling Fan Into a Light Fixture: A Comprehensive Guide
Upgrading your indoor lighting and ventilation system can be a rewarding task, and installing a ceiling fan into an existing light fixture is a common way to achieve both. This guide will provide a comprehensive overview of the essential aspects involved in this installation, ensuring a safe and successful outcome.
1. Safety Precautions
Before starting any electrical work, it is imperative to follow safety precautions. Turn off the electricity at the breaker panel, and verify that the power is off using a voltage tester. Wear safety glasses and gloves, and ensure your work area is well-ventilated.
2. Compatibility and Preparation
Check if your ceiling fan is compatible with your existing light fixture. Measure the distance between the blades and the ceiling to ensure adequate clearance. Remove the old light fixture and prepare the electrical wires by stripping the ends and connecting them using wire nuts. If necessary, use a ceiling fan-rated electrical box to provide support.
3. Mounting the Bracket
Attach the ceiling fan mounting bracket to the ceiling electrical box using the provided screws. Ensure the bracket is level and securely fastened. Connect the electrical wires from the ceiling to the fan, matching the colors (black to black, white to white, and ground to ground).
4. Hanging the Fan
Lift the ceiling fan and align it with the mounting bracket. Secure the fan to the bracket with the provided screws or quick-connect mechanism. Once the fan is securely mounted, reconnect the wires between the fan and the bracket.
5. Installing Blades and Lighting
Attach the ceiling fan blades to the motor, following the manufacturer's instructions. Ensure the blades are balanced to prevent wobbling. If your fan includes a light fixture, install the bulbs and globe or shade according to the manufacturer's guidelines.
6. Final Checks and Testing
Turn on the electricity and check if the fan is running smoothly. Adjust the speed and oscillation settings to ensure proper operation. Tighten any loose screws or bolts to ensure stability. If you experience any issues, refer to the manufacturer's manual or contact a qualified electrician.
Conclusion
Installing a ceiling fan into a light fixture can enhance your home's comfort and aesthetics. By following these steps and adhering to safety precautions, you can ensure a successful installation that will provide years of reliable operation. Remember to consult the manufacturer's guidelines and seek professional assistance if needed to ensure the best possible outcome.
Replacing A Ceiling Fan Light With Regular Fixture Jlc

Replacing A Ceiling Fan Light With Regular Fixture Jlc

How To Replace A Ceiling Fan With Pendant Light

How To Replace A Ceiling Fan With Pendant Light

Replace Light Fixture W Ceiling Fan R Askanelectrician

Wiring A Ceiling Fan And Light With Diagrams Ptr
I Recently Installed A Ceiling Fan With Light Where There Was Formerly Just It Works Great But The Switch On Wall Doesn T Turn Off Why

Wiring A Ceiling Fan And Light With Diagrams Ptr

Wiring A Ceiling Fan And Light With Diagrams Ptr
Ceiling Fan Light Fixture Replacement Ifixit Repair Guide
Related Posts

