Installing a Ceiling Fan-Rated Electrical Box
Installing a ceiling fan can be a daunting task, but it's important to ensure that the electrical box is properly rated for the job. Ceiling fan-rated electrical boxes are designed to support the weight of the fan and provide a secure connection to the electrical system. Here's a step-by-step guide to help you install a ceiling fan-rated electrical box:
Step 1: Safety First
Before starting any electrical work, turn off the power at the circuit breaker panel. This will help prevent electrical shock or injury.
Step 2: Choose the Right Box
Make sure to select a ceiling fan-rated electrical box. These boxes are typically made of steel or plastic and are designed to support the weight of the fan. The box should also be compatible with the size and style of your ceiling fan.
Step 3: Determine the Location
Decide where you want to install the ceiling fan. The ideal location is usually in the center of the room. Once you have determined the location, mark the studs in the ceiling using a stud finder.
Step 4: Cut the Hole
Use a drywall saw to cut a hole in the drywall that is large enough to accommodate the electrical box. The hole should be centered on the marked stud.
Step 5: Install the Electrical Box
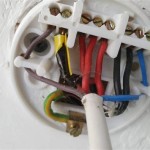
Pull the electrical wires through the hole in the drywall. Connect the wires to the appropriate terminals on the electrical box. Secure the electrical box to the stud using the provided screws.
Step 6: Install the Mounting Bracket
Attach the mounting bracket to the electrical box. The mounting bracket will support the ceiling fan.
Step 7: Install the Ceiling Fan
Lift the ceiling fan into place. Align the mounting bracket on the fan with the mounting bracket on the electrical box. Secure the ceiling fan to the mounting bracket using the provided screws.
Step 8: Turn on the Power
Turn on the power at the circuit breaker panel. Test the ceiling fan to make sure it is working properly.
Tips:
- Always follow the manufacturer's instructions for installing the ceiling fan and electrical box.
- If you are not comfortable performing electrical work, hire a qualified electrician to do it for you.
- Make sure to use the correct size and type of screws for the electrical box and mounting bracket.
- Caulk around the electrical box to prevent air leaks.
By following these steps, you can safely and easily install a ceiling fan-rated electrical box. This will provide a secure foundation for your ceiling fan, ensuring that it operates safely and efficiently for years to come.
:strip_icc()/SCW_128_11-7e1617dc2e414228b5d03568d1c7c022.jpg?strip=all)
How To Install A Ceiling Fan Electrical Box

Ceiling Fan Junction Box R Electrical
:strip_icc()/SCW_128_02-cefb4c77582c4dbaaba07e619aeacf8f.jpg?strip=all)
How To Install A Ceiling Fan Electrical Box

Electric Box For Ceiling Fan Install Doityourself Com Community Forums

How To Retrofit A Ceiling Fan Electrical Box Fine Homebuilding

How To Install A Ceiling Fan Dummies

How To Retrofit A Ceiling Fan Electrical Box Fine Homebuilding

Ceiling Fan Wobbly Electrical Box Is Loose Doityourself Com Community Forums

Installing A Ceiling Fan Fine Homebuilding

How To Replace A Light Fixture With Ceiling Fan Projects By Peter
Related Posts

