Installing Ceiling Fan Wires Connect: Essential Aspects to Consider
Installing a ceiling fan involves connecting electrical wires, which requires proper knowledge and adherence to safety guidelines. Failing to connect the wires correctly can lead to electrical hazards, malfunctioning fans, and potential fire risks. This article will delve into the essential aspects of connecting ceiling fan wires, ensuring a safe and successful installation.
Before starting, identify the part of speech of "Installing Ceiling Fan Wires Connect." In this case, it is a verb phrase combining the verb "install" with a noun phrase ("ceiling fan wires connect"). This verb phrase describes the action of connecting electrical wires during ceiling fan installation.
Understand the Wiring Diagram
The first step is to study the wiring diagram provided with the ceiling fan. This diagram will show the correct connections between the fan wires, house wires, and any necessary switches or controllers. Understanding the diagram will prevent incorrect wiring, ensuring the fan operates safely and as intended.
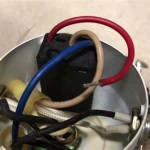
Identify the Wire Colors and Functions
Ceiling fan wires typically follow standard color codes, with each color representing a specific function. The most common wire colors are black (line), white (neutral), green (ground), blue (switch loop), and red (light kit). Proper identification of these colors is crucial for connecting the wires correctly.
Make Secure Electrical Connections
Use wire nuts to create secure electrical connections. Wire nuts twist onto the exposed ends of the wires, creating a capped connection that prevents loose wires or short circuits. Make sure to twist the wire nuts clockwise until they are tight and snug against the insulation on the wires.
Grounding the Fan
All electrical devices require proper grounding to protect against electrical shocks. The green wire from the ceiling fan must be connected to the ground wire (typically bare copper) from the junction box. This connection provides a path for excess electricity to discharge safely into the ground.
Test the Connections
Before mounting the fan blades, turn on the power and check if the fan is operating correctly. Use a circuit tester or multimeter to verify if the wires are connected properly. If the fan doesn't turn on or functions abnormally, recheck the wire connections and consult the wiring diagram again.
Installing ceiling fan wires requires careful attention to detail and adherence to safety precautions. By following these essential aspects, you can ensure a successful and safe installation of your ceiling fan, providing efficient airflow and improved comfort in your home.

Wiring A Ceiling Fan And Light With Diagrams Ptr

Wiring A Ceiling Fan And Light With Diagrams Ptr

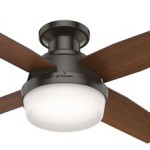
How To Wire A Ceiling Fan Temecula Handyman

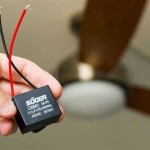
How To Wire A Ceiling Fan Control Using Dimmer Switch

Wiring A Ceiling Fan And Light With Diagrams Ptr

Wiring A Ceiling Fan And Light With Diagrams Ptr

How To Wire A Ceiling Fan Temecula Handyman

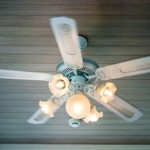
Installing A Ceiling Fan Fine Homebuilding

Wiring A Ceiling Fan And Light With Diagrams Ptr

How To Wire A Ceiling Fan Control Using Dimmer Switch
Related Posts