Essential Aspects of Installing Hunter Ceiling Fan with Light and Remote
Installing a Hunter ceiling fan with light and remote requires careful attention to several essential aspects to ensure safety, functionality, and aesthetic appeal. These aspects encompass various considerations, ranging from proper electrical wiring to choosing the right location and height, and ensuring correct blade balancing for optimal performance.
This article will delve into these key aspects, providing a comprehensive guide for a successful and seamless installation experience. From understanding the electrical requirements to selecting the appropriate hardware and tools, we will explore each step in detail to empower you with the knowledge and confidence needed for a successful installation.
Electrical Requirements
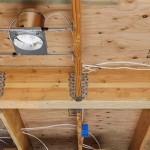
Ensuring proper electrical connections is paramount for the safe and reliable operation of your ceiling fan. Before beginning the installation, verify that your electrical box meets the following requirements:
- Rated for the weight of the fan
- Equipped with a dedicated circuit with the appropriate amperage
- Wired in accordance with local electrical codes
Mounting Hardware
Choosing the appropriate mounting bracket and hardware is crucial for securely attaching your ceiling fan to the electrical box. Hunter fans come with a universal mounting bracket compatible with most electrical boxes; however, it's essential to double-check the compatibility with your specific model.
Location and Height
Determining the optimal location and height for your ceiling fan is equally important for aesthetics and functionality. Consider the size of the room, the placement of furniture, and the desired airflow pattern. The fan should be centered within the room and mounted at a height that provides adequate clearance for both the blades and the light fixture.
Blade Balancing
Proper blade balancing is essential to prevent wobbling and ensure smooth operation of your ceiling fan. Hunter fans come with a blade balancing kit, which includes weights and instructions to help you achieve the necessary balance.
Wiring and Connections
The wiring process involves connecting the fan wires to the electrical box wires. Carefully follow the wiring diagram provided in the installation manual, ensuring that the wires are securely fastened and properly insulated. Double-check all connections before turning on the power.
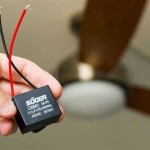
Remote Control Installation
Most Hunter ceiling fans come with a remote control for convenient operation. The remote receiver should be mounted on the ceiling fan canopy, and the remote transmitter can be placed anywhere within the range.
Conclusion
Installing a Hunter ceiling fan with light and remote involves several essential aspects that require careful consideration. By following the guidelines outlined in this article, you can ensure a safe, functional, and stylish installation that will enhance the comfort and ambiance of your living space.

Hunterexpress Easy Installation Ceiling Fan Hunter

How Do I Install New Hunter Ceiling Fan With Remote Control And Still Have Switch Wall For The Light Separately R Homemaintenance

Hunterexpress Easy Installation Ceiling Fan Hunter

Bypass Hunter Fan Receiver Doityourself Com Community Forums

How To Install A Ceiling Fan With Remote Control Electrical

How To Install A Ceiling Fan Hunter

Hunter Georgetown 52 In Integrated Led Indoor Matte Black Ceiling Fan With Light Kit And Remote Included 51879 The Home Depot

Hunter Erikson 52 In Indoor Burnished Brass Ceiling Fan With Remote And Light Kit 51728 The Home Depot

How To Wire A Ceiling Fan Control Using Dimmer Switch

Converting An Existing Ceiling Fan To A Remote Control
Related Posts