Light installation in a ceiling tile how to install lighting your kanopi by armstrong replacing drop tiles replace an old fluorescent fixture young house love installing flush mount llight into refinish paint remodeling decorating construction energy use kitchen bathroom bedroom building rooms city data forum great alternative lights dropped flat panel led on homeserve usa

Light Installation In A Ceiling Tile

How To Install Lighting In Your Ceiling Kanopi By Armstrong

Replacing Drop Ceiling Tiles

How To Install Lighting In Your Ceiling Kanopi By Armstrong

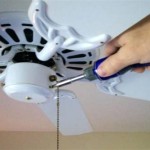
How To Replace An Old Fluorescent Light Fixture Young House Love

Replacing Drop Ceiling Tiles

Installing Flush Mount Llight Fixture Into Drop Ceiling Refinish Paint House Remodeling Decorating Construction Energy Use Kitchen Bathroom Bedroom Building Rooms City Data Forum

Great Alternative To Drop Ceiling Lighting Lights Dropped

How To Install A Flat Panel Led Light On Ceiling

Replacing Drop Ceiling Tiles

Drop Ceiling Installation How To Install A Homeserve Usa

Finishing A Basement 10 Things You Must Know Dropped Ceiling Installing Recessed Lighting

Drop Ceiling Tiles Installation Tips Diy Family Handyman

How To Replace A Drop Ceiling The Lilypad Cottage

Styrofoam Ceiling Tile Project In Roanoke Talissa Decor

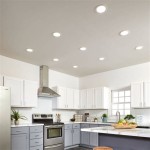
How To Installing Recessed Lighting

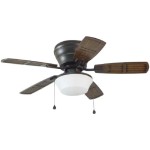
Light Fixture Installation New For The Master Bedroom

Lighting Gallery Net Led Except Road Lanterns Leds In General Lasers Flashlights And Other Gadgets The S Carmel Hospital Installed Drop Ceiling With Panels At Entrance To

Sara S Kitchen Tour Part 1 Lighting Vintage Tin Ceiling Tile Faux

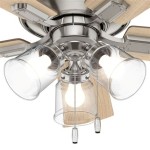
Replacing Flush Mount Light With Pendant
Light installation in a ceiling tile how to install lighting your replacing drop tiles old fluorescent fixture installing flush mount llight lights flat panel led on