Installing a Light Fixture in a Drop Ceiling: A Comprehensive Guide
Drop ceilings, also known as suspended ceilings, are common in commercial and office settings. They provide an accessible way to route various utilities, such as electrical wiring, HVAC ducts, and plumbing. If you need to install a new light fixture in a drop ceiling, following these steps can ensure a safe and professional-looking installation.
Planning and Preparation
Before beginning the installation, take the time to plan your layout and gather the necessary tools and materials. Determine the desired location for the light fixture and ensure that there is adequate electrical wiring available. You will need a stepladder, a drill, screws, a wire stripper, electrical tape, and a voltage tester.
Accessing the Drop Ceiling
To access the drop ceiling, locate the access panels or tiles that provide a removable opening. These panels typically have a recessed edge or a release mechanism that allows you to lift them out. Once you have access to the ceiling cavity, you can proceed with the installation.
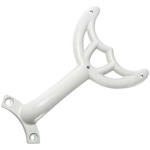
Mounting the Fixture Base
The light fixture base is the component that will support the light fixture in the ceiling. Determine the appropriate location for the base and mark it on the ceiling grid. Use a drill to create pilot holes for the screws and then secure the base to the grid using the provided hardware.
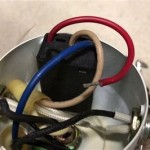
Connecting the Electrical Wiring
Identify the electrical wires in the ceiling cavity and use the wire stripper to remove a small section of insulation from the ends. Connect the wires from the light fixture to the wires in the ceiling using electrical tape. Ensure that the connections are secure and insulated properly.
Testing the Fixture
Before completing the installation, temporarily turn on the light fixture to ensure that it is functioning correctly. If the light fixture does not illuminate, check the electrical connections and ensure that the voltage is reaching the fixture.
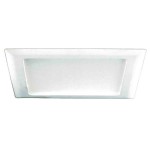
Installing the Fixture Body
Once you have confirmed that the fixture is working, proceed with installing the fixture body. Align the fixture body with the base and secure it using the provided screws or fasteners. Position the fixture so that it is level and centered in the designated area.
Completing the Installation
The final step is to replace the access panels or tiles in the drop ceiling. Ensure that the panels are securely in place and that there are no gaps or open spaces around the light fixture. Clean any debris or dust from the installation area, and enjoy the updated lighting in your drop ceiling.

Install Lighting In A Suspended Ceiling Doityourself Com

Installing Flush Mount Llight Fixture Into Drop Ceiling Refinish Paint House Remodeling Decorating Construction Energy Use Kitchen Bathroom Bedroom Building Rooms City Data Forum

Drop Ceiling Installation How To Install A Homeserve Usa

Drop Ceiling Tile Showroom Suspended Installation How To Install Ceilings Supplies Super Diy Instructional S Commercial And Residential In

How To Install Recessed Lights In A Drop Ceiling Temecula Handyman

Operation Laundry Room Lighting Reality Daydream

Drop Ceiling Tiles Installation Tips Diy Family Handyman

How To Replace A Drop Ceiling The Lilypad Cottage

Replacing Drop Ceiling Tiles

Replacing Drop Ceiling Tiles
Related Posts