Installing a Light Kit on a Hunter Ceiling Fan
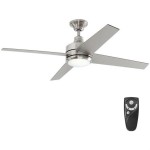
Hunter ceiling fans are an excellent way to improve the air circulation in your home and add a touch of style to any room. Many Hunter ceiling fans come with the option to install a light kit, which can provide additional illumination and make your fan even more versatile.
If you're thinking about installing a light kit on your Hunter ceiling fan, here's a step-by-step guide to help you get the job done safely and correctly:
Step 1: Gather Your Materials
Before you start, gather all the materials you'll need for the installation:
- Hunter ceiling fan light kit
- Screwdriver
- Wire cutters
- Electrical tape
- Ladder
Step 2: Turn Off the Power
Safety first! Turn off the power to the ceiling fan circuit at the electrical panel before you start any work.
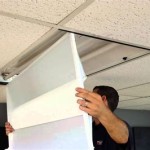
Step 3: Remove the Fan Blades
Using a screwdriver, carefully remove the screws that hold the fan blades in place. Set the blades aside in a safe place.
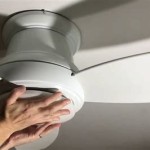
Step 4: Remove the Motor Housing Cover
Locate the motor housing cover on the bottom of the fan. Use a screwdriver to remove the screws that hold it in place. Carefully lift the cover off the fan.
Step 5: Connect the Light Kit Wires
The light kit will come with wires that need to be connected to the wires in the fan. Match the colors of the wires and twist them together. Secure the connections with electrical tape.
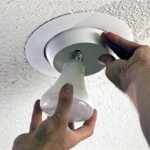
Step 6: Install the Light Kit
Align the light kit with the holes in the motor housing. Carefully lift the light kit into place and secure it with the screws provided.
Step 7: Reinstall the Motor Housing Cover
Place the motor housing cover back onto the fan and secure it with the screws you removed earlier.
Step 8: Reinstall the Fan Blades
Reattach the fan blades to the fan and secure them with the screws you removed earlier.
Step 9: Turn the Power Back On
Go to the electrical panel and turn the power back on to the ceiling fan circuit.
Congratulations! You have now successfully installed a light kit on your Hunter ceiling fan.
Tips
- If you're not comfortable working with electricity, it's best to hire a qualified electrician to install the light kit.
- Make sure the light kit you choose is compatible with your Hunter ceiling fan.
- Follow the manufacturer's instructions carefully for your specific light kit.
- Always turn off the power to the ceiling fan circuit before starting any work.

Installation Instructions For Hunter Ceiling Fan

Hunterexpress Easy Installation Ceiling Fan Hunter

How To Install A Multi Light Kit On Your Hunter Ceiling Fan 5x Seri R Ceilingfans

Changing Ceiling Fan Light Kit Doityourself Com Community Forums

How To Install A Ceiling Fan Hunter

Hunter Newsome 52 In Indoor Premier Broe Bowl Light Kit Ceiling Fan 53311 The Home Depot

How To Install A Ceiling Fan Hunter

Hunter Kenbridge 52 In Led Low Profile Indoor Brushed Nickel Ceiling Fan With Light Kit 53380 The Home Depot

Hunter Georgetown Easy Install 52 In Matte Black Integrated Led Indoor Ceiling Fan With Light And Remote 6 Blade The Fans Department At Com

Hunter 52 Studio Series New Broe Ceiling Fan With Light Kit And Pull Chain Com
Related Posts