Installing Recessed Lights in a Suspended Ceiling: A Comprehensive Guide
Recessed lighting is a versatile and popular choice for both residential and commercial spaces, offering a sleek and modern look while providing ample illumination. If you're looking to install recessed lights in a suspended ceiling, this comprehensive guide will provide you with all the necessary information and step-by-step instructions.
1. Planning and Preparation
Before starting the installation process, it's crucial to plan and gather the necessary materials. Determine the number of recessed lights you need based on the size and layout of the room, and choose the appropriate fixtures and bulbs. Ensure you have a voltage tester, drill, saw, wire connectors, ceiling grid tiles, and safety equipment such as gloves and goggles.
2. Safety Precautions
Working with electricity can be hazardous, so safety should be your top priority. Turn off the power to the circuit where you'll be working and verify that it's turned off using a voltage tester. Wear appropriate protective gear and follow all safety guidelines to avoid electrical shock and other potential hazards.
3. Determining the Location and Height
Mark the desired location of each recessed light fixture on the ceiling grid. The height should be determined based on the type of fixture and the desired lighting effect. Generally, recessed lights are installed 2-3 feet from the ceiling for optimal illumination.
4. Removing Ceiling Grid Tiles
Remove the ceiling grid tiles where the recessed lights will be installed. Use a screwdriver or pliers to unhook the tiles from the grid and gently pull them down. Handle the tiles carefully to avoid damaging them.
5. Cutting Holes for the Fixtures
Using a hole saw attached to a drill, cut holes in the ceiling tiles to accommodate the recessed light fixtures. The size of the holes should be slightly larger than the diameter of the trim rings on the fixtures.
6. Installing Junction Boxes
Mount junction boxes to the ceiling joists above the holes in the tiles. These boxes will house the electrical connections for the recessed lights. Secure the boxes firmly using screws or nails.
7. Wiring the Fixtures
Strip the ends of the wires coming from the junction boxes and the recessed light fixtures. Connect the wires according to the manufacturer's instructions, matching the colors (black to black, white to white, and ground to ground). Secure the connections using wire connectors and tuck them securely into the junction boxes.
8. Installing the Recessed Lights
Place the recessed lights into the holes in the ceiling tiles, pushing them up until the trim rings are flush with the surface. Secure the lights using screws or springs provided with the fixtures.
9. Reinstalling Ceiling Grid Tiles
Reinstall the ceiling grid tiles by hooking them back into the grid and pushing them up into place. Ensure they are securely fastened and level.
10. Restoring Power and Testing
Restore power to the circuit and test the recessed lights. Turn on the lights and ensure they are functioning properly. Check for any loose connections or flickering lights and address them promptly.
Additional Tips:
- Use insulation-rated recessed light fixtures to prevent heat buildup.
- Consider using dimmable recessed lights to adjust the lighting intensity.
- Install a dimmer switch to control the brightness of the recessed lights.
- If you encounter any difficulties during the installation process, consult an experienced electrician for assistance.

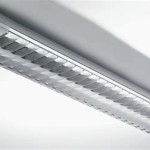
How To Install Recessed Lights In A Drop Ceiling Temecula Handyman

How To Install Lighting In Your Ceiling Kanopi By Armstrong

How To Install Recessed Lights In A Drop Ceiling Temecula Handyman

Diy Recessed Lighting Installation In A Drop Ceiling Tiles Part 3 Super Nova Adventures

How To Install Lighting In Your Ceiling Kanopi By Armstrong

Diy Recessed Lighting Installation In A Drop Ceiling Tiles Part 3 Super Nova Adventures

How To Put Recessed Lights In The Ceiling

How To Install Recessed Lights In A Drop Ceiling The Home Depot

Diy Recessed Lighting Installation In A Drop Ceiling Tiles Prep Work Super Nova Adventures

Drop Ceiling Tiles Installation Tips Diy Family Handyman
Related Posts