Mastering the Art of Manhattan Remote Control Ceiling Fan Installation
Elevate your home's comfort and style with the effortless installation of a Manhattan remote control ceiling fan. This comprehensive guide will empower you with the knowledge and techniques necessary to complete the task with precision and confidence.
1. Assembling the Components
Begin by carefully assembling the fan components, including the motor housing, blades, and blade holders. Follow the manufacturer's instructions meticulously to ensure proper alignment and secure fastening.
2. Prepping the Electrical Wiring
Before installing the fan, identify the electrical wires in your ceiling. Ensure that power is turned off at the circuit breaker or fuse box. Use a voltage tester to verify that the wires are safe to handle.
3. Mounting the Bracket
Locate the ceiling joist and securely mount the ceiling bracket using the provided screws or bolts. This is crucial for ensuring the fan's stability and preventing any potential hazards.
4. Connecting the Wiring
Connect the fan's electrical wires to the corresponding ceiling wires. Typically, black wires are connected to black wires, white to white, and green or bare wires to ground wires. Use wire nuts to secure the connections.
5. Installing the Fan Motor
Carefully lift the fan motor assembly and align it with the mounting bracket. Securely tighten the screws to hold the motor firmly in place.
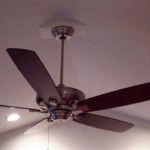
6. Attaching the Blades
Insert the blades into the blade holders and secure them with the provided screws. Ensure that the blades are properly balanced to prevent any wobbling or noise during operation.
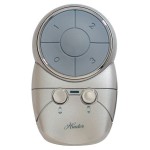
7. Installing the Remote Control Receiver
Locate a suitable place for the remote control receiver, ensuring it can receive clear signals from the handheld remote. Mount the receiver using the provided screws or double-sided tape.
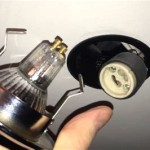
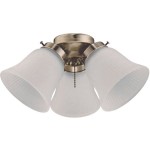
8. Installing the Light Fixture (if applicable)
If your fan includes a light fixture, connect the fixture's wires to the fan's electrical wires. Carefully lift the light fixture into place and secure it with screws or a latching mechanism.
9. Testing and Finalizing
Once all components are installed, turn on the power and test the fan's operation. Adjust the fan's speed and light settings to your preference. Ensure that the fan is running smoothly and without any noticeable vibrations.
Conclusion
With careful planning and attention to detail, you can successfully install a Manhattan remote control ceiling fan. This guide has provided you with the essential steps to ensure a safe and seamless installation, enhancing the comfort and aesthetics of your home.

Manhattan Remote Control Ceiling Fan

Manhattan Habitat Id8 Ceiling Fan Remote Control Duplicate 17 0 World

Argos Manhattan 432 8317 Assembly Instruction Manualslib

Buy Habitat Manhattan Ceiling Fan White Fans Argos

Home Manhattan Remote Control Ceiling Fan White Glass Shade Missing

Buy Habitat Manhattan Ceiling Fan White Fans Argos

Manhattan Habitat Id8 Ceiling Fan Remote Control Duplicate 17 0 World

Buy Argos Home Manhattan Ceiling Fan Satin Nickel Fans
/yaootaweb-production-ng/media/crawledproductimages/ad818f068994fbb54b627d0bf0ee465179ded804.jpg?strip=all "Argos Home Manhattan Remote Control Ceiling Fan Satin Nickel From Jumia In Yaoota")
Argos Home Manhattan Remote Control Ceiling Fan Satin Nickel From Jumia In Yaoota

Manhattan Habitat Id8 Ceiling Fan Remote Control Duplicate 17 0 World
Related Posts