Essential Aspects of Mounting Can Lights in Drop Ceilings
Drop ceilings, also known as suspended ceilings, offer a versatile and cost-effective way to enhance the aesthetics and functionality of any space. Integrating can lights into these ceilings can further elevate the lighting design and provide optimal illumination. However, proper installation techniques are crucial to ensure safety, longevity, and optimal performance.
Mounting can lights in drop ceilings involves several key steps that require attention to detail and proper execution. Here's a comprehensive guide to assist you in successfully completing this task:
1. Selecting Compatible Can Lights
The first step is choosing can lights compatible with your drop ceiling system. Consider the type of ceiling tiles used, their thickness, and the size of the cutouts required for the lights. Ensure the can lights fit snugly within the cutouts to avoid gaps or instability.
2. Cutting the Hole
Once you have the appropriate can lights, carefully cut the holes in the ceiling tiles using a hole saw. Mark the locations accurately and cut precisely to ensure a clean and secure fit. The hole size should match the diameter of the can light housing.
3. Connecting the Electrical Wiring
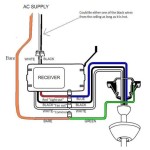
Before installing the can lights, connect the electrical wiring according to the manufacturer's instructions. Use wire nuts and electrical tape to make secure and code-compliant connections. Test the connections with a voltage tester to verify proper functionality.
4. Installing the Mounting Brackets
The next step is to install the mounting brackets that will hold the can lights in place. Most can lights come with adjustable brackets that allow for precise positioning. Secure the brackets to the ceiling grid or joists using screws or bolts, ensuring they are level and firmly attached.
5. Placing the Can Light
Carefully lift the can light into place and align it with the mounting brackets. Ensure the housing is properly seated within the brackets and the trim ring is flush with the ceiling tile.
6. Securing the Can Light
Tighten the screws or bolts on the mounting brackets to secure the can light firmly. Apply moderate pressure to ensure a snug fit, but avoid overtightening to prevent damage to the brackets or ceiling tiles.
7. Installing the Trim
Finally, install the trim ring around the can light housing. Choose a trim that complements the ceiling tiles and the overall design of the space. Most trim rings simply snap into place or are secured with screws.
8. Safety Precautions
Always adhere to electrical safety guidelines when working with can lights. Turn off the power at the circuit breaker before starting any installation or maintenance work. Use caution when handling electrical wires and ensure all connections are secure. If you are unsure about any aspect of the installation, consult a qualified electrician.
Conclusion
Mounting can lights in drop ceilings requires meticulous attention to detail, proper preparation, and adherence to safety protocols. By following the steps outlined in this guide, you can successfully integrate can lights into your drop ceiling system, enhancing the lighting and aesthetics of your space. Remember to use high-quality materials, follow manufacturer's instructions carefully, and prioritize safety throughout the process.

How To Install Recessed Lights In A Drop Ceiling The Home Depot

Diy Recessed Lighting Installation In A Drop Ceiling Tiles Part 3 Super Nova Adventures

Diy Recessed Lighting Installation In A Drop Ceiling Tiles Part 3 Super Nova Adventures

How To Install Recessed Lights In A Drop Ceiling The Home Depot

How To Install Recessed Lights In A Drop Ceiling The Home Depot

How To Install Recessed Lights In A Drop Ceiling The Home Depot

Diy Recessed Lighting Installation In A Drop Ceiling Tiles Part 3 Super Nova Adventures

What Are The Differences Between Recessed Surface And Suspended Mounting Agc Lighting

8 Recessed Lighting Installation Tips For Diyers Bob Vila

How To Install Recessed Lights In A Drop Ceiling The Home Depot
Related Posts


