Pot Lights for Sloped Ceilings: A Comprehensive Guide
Pot lights, also known as recessed lighting, are an increasingly popular choice for illuminating homes with style and efficiency. Their compact design and ability to cast light in various directions make them an ideal option for both residential and commercial applications.
When it comes to installing pot lights on sloped ceilings, there are a few unique considerations to keep in mind. In this guide, we will explore the essential aspects of pot light installation on sloped ceilings, ensuring a successful and aesthetically pleasing result.
1. Planning and Measurement
Proper planning and measurement are crucial for a successful pot light installation. Determine the desired placement and spacing of the lights, taking into account the slope of the ceiling. Use an inclinometer or a spirit level to measure the angle of the slope and ensure the pot lights are installed level.
2. Electrical Wiring
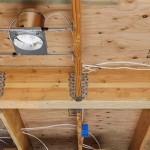
Electrical wiring for pot lights on a sloped ceiling requires careful planning. Determine the location of the junction boxes and run wires accordingly. Use flexible conduit to accommodate the slope of the ceiling and provide additional support for the wires.
3. Junction Box Placement
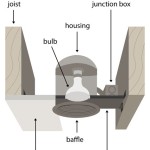
Junction boxes serve as electrical connection points for the pot lights. On sloped ceilings, it is essential to install junction boxes level to ensure proper alignment of the pot lights and prevent any sagging or uneven spacing.
4. Recessed Housings
Recessed housings accommodate the pot lights and provide a secure and thermally insulated mounting point. Choose airtight housings to prevent air leaks and minimize heat loss, especially on sloped ceilings where heat can travel more easily.
5. Insulation and Ventilation
Proper insulation and ventilation are essential to prevent heat buildup and potential fire hazards. Use insulation baffles or thermal insulation to prevent contact between the recessed housings and insulation. Ensure adequate ventilation around the pot lights to dissipate heat and prevent overheating.
6. Trim Installation
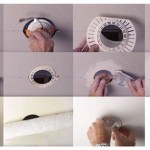
Trim is the visible part of the pot light that directs and shapes the light. Choose trim that complements the style of the room and provides the desired beam angle. Use adjustable trims to accommodate the slope of the ceiling and ensure a flush and even finish.
Installing pot lights on sloped ceilings requires meticulous planning, careful electrical work, and proper insulation and ventilation. By following the guidelines outlined in this guide, you can ensure a successful and visually appealing lighting solution that enhances the aesthetics and functionality of your home.

Halo H47 6 In Aluminum Recessed Lighting Housing For New Construction Sloped Ceiling Insulation Contact Air Tite H47icat The Home Depot

Sloped Ceiling Recessed Lighting Jdm Electrical Contractors

Halo 6 In White Recessed Lighting With Sloped Ceiling Trim Baffle 456w The Home Depot

Elco 4 Sloped Ceiling Led Baffle Insert El42330w Buyrite Electric

Halo 6 In Selectable Cct 2700k To 5000k Integrated Led White Recessed Light Sloped Ceiling Trim Direct Mount Module Rls6159fs1ewhdmr The Home Depot

Need To Upgrade Recessed Lights In My Vaulted Ceiling

How To Install Recessed Lighting On Sloped Ceilings The Home Depot

Sloped Ceiling Recessed Lights Really Necessary For Ceilings R Homeimprovement

Recessed Ceiling Lights Ledsmaster Led Lighting

Led Recessed Lighting For Sloped Ceilings 3 4 Aperture Options
Related Posts


