Installing a New Ceiling Light - A Comprehensive Guide
Whether you're updating the look of a room or adding new lighting to an existing space, installing a new ceiling light can be a rewarding DIY project. While the steps involved may seem daunting, most homeowners can tackle this project with careful preparation and a few essential tools. In this comprehensive guide, we'll walk you through every step of the process, from choosing the right light fixture to securing it in place.
1. Safety First: Preparing for Installation
Before you begin any electrical work, safety precautions are paramount. Ensure that the power supply to the light fixture is disconnected at the circuit breaker panel. It's crucial to ensure that someone isn't accidentally turning the power back on while you're working. Covering the breaker with masking tape or placing a note on the panel will help prevent such incidents.
2. Selecting the Right Light Fixture
When choosing a light fixture, consider the following factors:
- The size and shape of the room.
- The style of your decor.
- The amount of light you need.
- The type of light bulb you want to use.
Make sure the light fixture you choose is compatible with your existing wiring and ceiling height.
3. Gathering the Necessary Tools
To install your new ceiling light, you'll need the following tools:
- A drill and drill bits
- A screwdriver
- A wire stripper
- A pair of pliers
- A non-contact voltage tester
- A ladder
- Safety goggles
- Work gloves
4. Removing the Old Light Fixture
To remove the old light fixture, follow these steps:
- Turn off the power to the light fixture at the circuit breaker panel.
- Remove the cover plate or diffuser from the light fixture.
- Unscrew the light bulbs from the sockets.
- Disconnect the wiring from the light fixture.
- Remove the mounting screws or clips and carefully take down the old light fixture.
5. Installing the New Ceiling Light
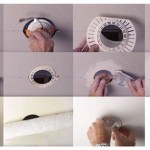
To install the new ceiling light, follow these steps:
- Turn off the power to the light fixture at the circuit breaker panel.
- Mount the light fixture bracket to the ceiling according to the manufacturer's instructions.
- Connect the wiring from the light fixture to the wiring in the ceiling box.
- Secure the light fixture to the mounting bracket.
- Install the cover plate or diffuser.
- Screw in the light bulbs.
- Turn on the power to the light fixture at the circuit breaker panel.
Conclusion
Installing a new ceiling light is a relatively straightforward project that most homeowners can complete in a few hours. By following these detailed instructions and taking the necessary safety precautions, you can add new light to your home while enhancing its overall style. Remember that if you're unsure about any part of the installation process, it's always best to consult a qualified electrician for assistance.

How To Install Ceiling Light Homeserve Usa

How To Install A Lighting Fixture Forbes Home

How To Change A Light Fitting Living By Homeserve

Mounting Light Fixtures Fine Homebuilding

How To Install A Stylish Chandelier

How To Install A New Light Fixture Apartment Therapy

How To Change A Ceiling Light Making Maanita

How To Change A Ceiling Light Making Maanita

How To Replace Install A Light Fixture The Art Of Manliness

How To Install A New Light Fixture Homerous
Related Posts


