Recessed Ceiling Light Bulb Replacement: A Comprehensive Guide
Recessed ceiling lights, also known as can lights, are a common lighting fixture in many homes and commercial buildings. They provide a sleek, modern look and can be used to create both ambient and accent lighting. However, when it comes time to replace a recessed ceiling light bulb, it can seem like a daunting task. Here is a comprehensive guide to help you safely and easily replace a recessed ceiling light bulb:
1. Gather Your Tools
Before you start, gather the following tools:
- A new recessed ceiling light bulb
- A step ladder or chair
- A pair of gloves
- A flathead screwdriver (optional)
2. Safety First
Before you begin working on the light fixture, make sure that the power to the circuit is turned off. You can do this by flipping the breaker or removing the fuse that powers the light fixture. Once the power is off, wear gloves to protect your hands from any sharp edges.
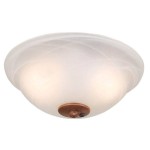
3. Remove the Trim Ring
Once the power is off, you can start removing the trim ring that holds the light bulb in place. Most trim rings are held in place by a spring clip. To remove the trim ring, simply use your fingers or a flathead screwdriver to pry it loose from the ceiling. Be careful not to damage the trim ring or the ceiling.
4. Remove the Light Bulb
Once the trim ring is removed, you will be able to see the light bulb. To remove the light bulb, simply grasp it and pull it straight down. Be careful not to drop the light bulb.
5. Install the New Light Bulb
Take the new light bulb and insert it into the socket. Make sure that the light bulb is properly seated in the socket before you release it.
6. Reinstall the Trim Ring
Once the new light bulb is installed, you can reinstall the trim ring. Simply align the trim ring with the ceiling and push it into place until it snaps into place.
7. Turn on the Power
Once the trim ring is reinstalled, you can turn the power back on. To do this, simply flip the breaker or replace the fuse that powers the light fixture. Once the power is back on, test the light bulb to make sure that it is working properly.
Tips
Here are a few tips to help you safely and easily replace a recessed ceiling light bulb:
- If you are not comfortable working on electrical fixtures, it is best to hire a qualified electrician.
- Always make sure that the power to the circuit is turned off before you begin working on the light fixture.
- Wear gloves to protect your hands from any sharp edges.
- Be careful not to damage the trim ring or the ceiling when removing the trim ring.
- Make sure that the new light bulb is properly seated in the socket before you release it.
- Test the light bulb to make sure that it is working properly before you leave.

Easy Ways To Replace An Led Recessed Light Bulb 13 Steps

How To Change A Recessed Light Bulb

How To Replace Recessed Lighting With Led The Home Depot

Easy Ways To Replace An Led Recessed Light Bulb 13 Steps

How To Change A Recessed Light Bulb

How To Change Any Type Of Recessed Light Bulb

How To Change A Recessed Or Canned Light Bulb

How To Replace Recessed Lighting With Led The Home Depot

How Do I Replace The Bulbs In These Recessed Ceiling Lights Recently Moved Into A Al With Can T Pull It Out By Edges Of Trim R Howto

How To Change A Lightbulb In Recessed Light 3 Easy Solutions
Related Posts