Essential Aspects of Recessed Lighting Installation in Existing Ceilings
Recessed lighting, also known as pot or can lighting, is a popular choice for modern home interiors. It offers a sleek, sophisticated look and can enhance the ambiance of any space. However, installing recessed lighting in an existing ceiling can be a challenging task that requires careful planning and execution. Here are some essential aspects to consider when undertaking this project:
1. Planning and Safety Precautions
Before starting any electrical work, it is crucial to plan the layout of your lighting and ensure all safety precautions are taken. Turn off the power at the breaker panel and consult local building codes to confirm proper installation practices. Determine the location of joists and studs to avoid drilling into them while cutting holes for the recessed lights.
2. Choosing the Right Lighting
Select recessed lighting fixtures that are compatible with your ceiling type and insulation. Pay attention to the size, wattage, and beam angle of the lights to achieve the desired lighting effect. Consider using LED bulbs for energy efficiency and longer lifespan.
3. Cutting Holes and Mounting the Housing
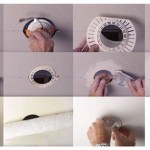
Use a hole saw of the appropriate size to cut circular holes in the ceiling for each light. Install the recessed housing units into the holes and secure them with screws. Make sure the housing is flush with the ceiling surface.
4. Wiring and Electrical Connections
Run electrical wires from the junction box to each recessed light housing. Connect the wires to the terminal block inside the housing, ensuring proper polarity (black wire to black terminal, white wire to white terminal, ground wire to green or bare copper terminal). Secure the connections with wire nuts.
5. Installing the Trim Kit
The trim kit provides the finishing touch and holds the light fixture in place. Align the trim kit over the housing and twist it into position. Use caution not to overtighten and damage the fixture.
6. Insulation Considerations
If your ceiling has insulation, ensure it is pushed back from the recessed light housing to prevent overheating. Install insulation baffles around the housing to create an air gap and improve heat dissipation.
7. Troubleshooting
If you encounter any issues during installation, check the following:
- Verify that the power is off at the breaker panel.
- Make sure all electrical connections are secure and tight.
- Confirm that the trim kit is installed correctly.
- If the lights are flickering or not working, check the bulb and replace it if necessary.
Installing recessed lighting in an existing ceiling can elevate the aesthetics and functionality of your space. By following these essential aspects and taking necessary safety precautions, you can successfully complete this project and enjoy the benefits of recessed lighting in your home.

How To Install Recessed Lighting Fixthisbuildthat

Energy Star Ask The Experts S

Install Recessed Lighting In Your Home Office

An Easy Inexpensive Way To Replace Your Old Recessed Lights With No Rewiring Making It In The Mountains

Installing Recessed Lights This Old House

Cost To Install Recessed Ceiling Lights In 2024 Forbes Home

How To Properly Install The Smart Recessed Lights Lumary

Armacost Lighting 6 In Housing Required 3000k Tunable Cct Remodel Led Recessed Light Kit Rgb Plus Ww Smart Downlight 246013 The Home Depot

Lighting Installation In Pasadena Md Magothy Electric

Replacing Old Recessed Can Lights W New Led Integrated Lighting R
Related Posts

