Essential Considerations for Remote Control Ceiling Fans With Lights Installation
Installing a remote control ceiling fan with lights can be a great way to update your home and improve its functionality. With the right preparation and tools, you can complete this project yourself. Here are some essential aspects to consider for a successful installation:
1. Electrical Wiring:
Ensure that your home's electrical wiring can handle the additional load of the ceiling fan and lights. This involves checking the circuit breaker or fuse box to determine the available amperage. If necessary, hire a qualified electrician to upgrade the wiring.
2. Mounting Location:
Choose a suitable location for the fan, considering factors like room size, ceiling height, and obstacles such as light fixtures or furniture. Measure the distance from the ceiling to the floor to ensure the fan blades won't interfere with people or objects below.
3. Electrical Box:
The electrical box that supports the fan must be securely attached to the ceiling joists and strong enough to hold the weight of the fan. If the existing box is not suitable, install a new one rated for the fan's weight.
4. Wiring and Connections:
Connect the electrical wires from the fan and lights to the electrical box. Carefully follow the manufacturer's instructions and use wire nuts to secure the connections. Make sure to match the wire colors (usually black, white, and ground) correctly.
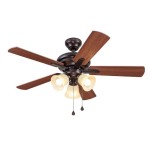
5. Fan Assembly:
Mount the fan blade holders, blades, and motor to the downrod. Connect the downrod to the housing on the ceiling and tighten securely. Ensure that all screws and bolts are properly tightened to prevent wobbling or noise during operation.
6. Light Kit Installation:
Install the light kit according to the manufacturer's instructions. Typically, this involves connecting the light fixture to the fan housing and securing it with screws. Install the bulbs in the light fixture.
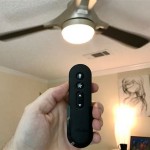
7. Remote Control Setup:
Pair the remote control with the fan and light receiver. This usually involves holding down a button on both the remote and the receiver until they sync. Follow the manufacturer's instructions for the specific remote control model.
8. Final Inspection:
After installation, thoroughly inspect the fan and light for any loose connections or damage. Turn on the fan and lights to ensure they operate correctly and without any abnormal noise or vibration. If any issues arise, consult the manufacturer's instructions or seek professional assistance.

Converting An Existing Ceiling Fan To A Remote Control

How To Install A Ceiling Fan With Remote Control Electrical

Hampton Bay Riley 44 In Indoor Led Brushed Nickel Ceiling Fan With Light Kit 5 Quickinstall Reversible Blades And Remote Control 52144 The Home Depot

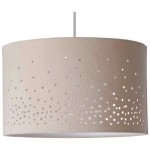
Ceiling Fan Lights Remote Control Glass Lampshade Modern Dining Room Bedroom Light Wh Cll 23 China Lamp Wood And With Made In Com

Antoine 36 In Modern Indoor Retractable Blade Ceiling Fan With Led Light And Remote Control Gold Crystal Hd Fsd 01 The Home Depot

Outdoor And Indoor Fan Install On Ceiling Easily Exhaust Fans With Led Lights Remote Control China Modern Made In Com

What S A Bladeless Ceiling Fan And Does It Really Work

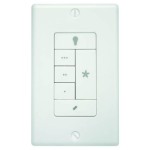
Ceiling Fans With Remote Wall Control Hunter Fan

Hampton Bay Ashby Park 52 In White Color Changing Integrated Led Matte Indoor Ceiling Fan With Light Kit And Remote Control 59258 The Home Depot

Dinglilighting Ceiling Fan With Light Flush Mount Fans Lights Low Profile Remote Control 42 Outdoor Timing Com
Related Posts