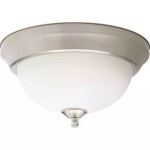
Essential Aspects of Removing a Ceiling Light Fitting
Removing a ceiling light fitting may seem like a daunting task, but with the right preparation and safety precautions, it can be done safely and efficiently. Here's a comprehensive guide to help you through the process:
Safety First
Before attempting any electrical work, it is crucial to prioritize safety. Turn off the circuit breaker associated with the light fixture you're removing to cut off power supply. Verify that the power is off by using a voltage tester before proceeding.
Gathering Tools and Materials
Gather the necessary tools for the job, including:
- Screwdriver (Phillips or flathead, depending on the fixture)
- Pliers li>Electrical tape
- Voltage tester
Removing the Fixture Cover
Locate the screws or clips that hold the fixture cover in place. Carefully unscrew or unclip them and set the cover aside.
Disconnecting the Wires
Inside the fixture, you'll find wires connected to the light socket. Identify the black (live) wire, white (neutral) wire, and ground wire (usually green or bare copper). Unscrew the wire nuts or use pliers to release the wires from the terminal block.
Supporting the Fixture
Before removing the fixture, support it with your hand or have someone assist you. Electrical wires may still be attached, which can cause the fixture to fall if not supported.
Detaching the Fixture
Locate the screws or bolts that hold the fixture to the ceiling box. Carefully unscrew or unbolt them and gently lower the fixture. Note the position of the wires to ensure they don't get tangled.
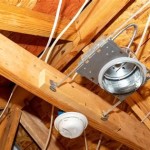
Removing the Ceiling Box (Optional)
If desired, you can remove the ceiling box by unscrewing the mounting screws or bolts that hold it in place. Use caution as the box may contain sharp edges.
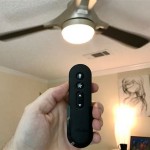
Reversing the Process for Installation
To install a new light fixture, simply reverse the steps above. Position the new fixture in the ceiling box and secure it with screws or bolts. Connect the wires to the terminal block using wire nuts or pliers and ensure they are tightened securely. Install the fixture cover and turn on the power to test the light.
By following these steps and adhering to safety precautions, you can safely remove a ceiling light fitting and replace it with a new one. Remember to consult an electrician if you encounter any difficulties or have concerns about electrical work.

How To Replace Install A Light Fixture The Art Of Manliness

How To Replace A Ceiling Light Home

How To Replace A Ceiling Fan With Pendant Light

Changing A Light Fitting

How To Replace An Old Fluorescent Light Fixture Young House Love

How To Remove A Light Fixture In 6 Steps Apartment Therapy

How To Remove Ceiling Light Fixture Doityourself Com Community Forums

How To Replace Install A Light Fixture The Art Of Manliness

How To Replace An Old Fluorescent Light Fixture Young House Love

How To Change A Ceiling Light Making Maanita